 Sialkot, Pakistan
 Worldwide enquiries

A customer can ask for a roomy T-shirt and still dislike the first sample. The chest may feel right, but the hem sits too low. Shortening the body might solve that problem—or expose a new one when the wearer sits down. These are proportion decisions, and a fit name alone does not settle them.
Oversized describes intended room around the wearer; boxy describes a broad, relatively compact silhouette. A T-shirt can be both. For a clothing brand, the practical task is to translate the look into a sample brief that a pattern maker can interpret and the brand can evaluate consistently.
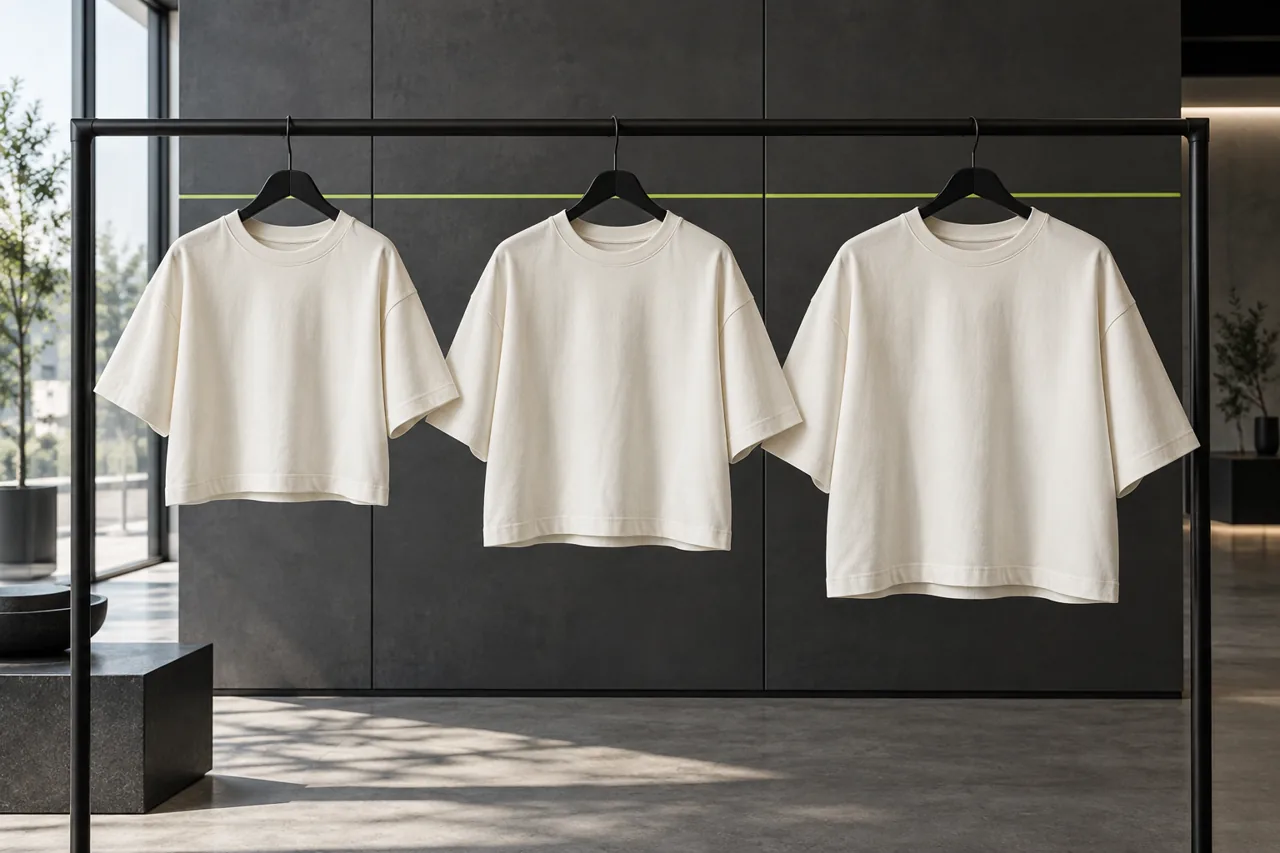
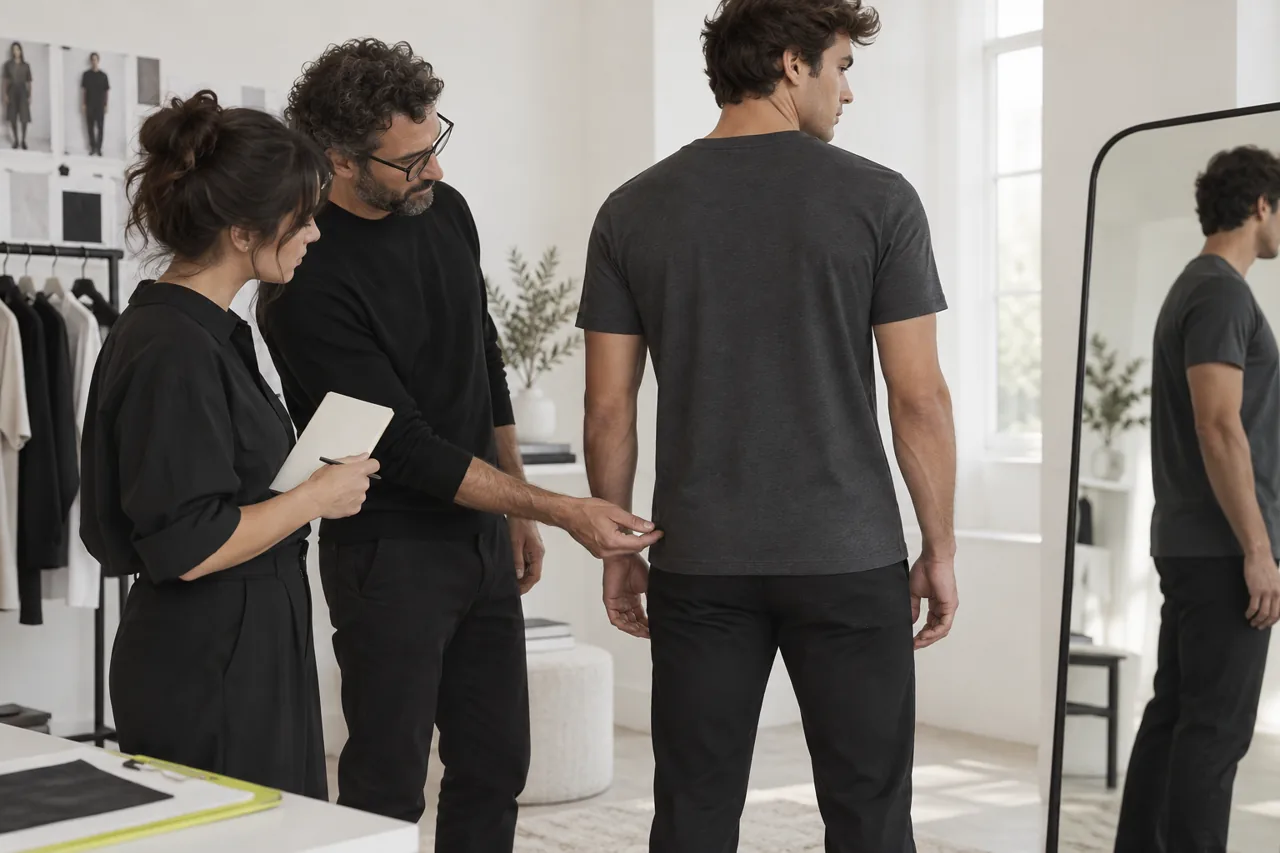
This guide focuses on choosing and approving the silhouette, rather than selecting a fabric or building a complete size chart. The images are original illustrative concepts, not photographs of Athletic Rush inventory, measured fit trials or production-ready patterns.
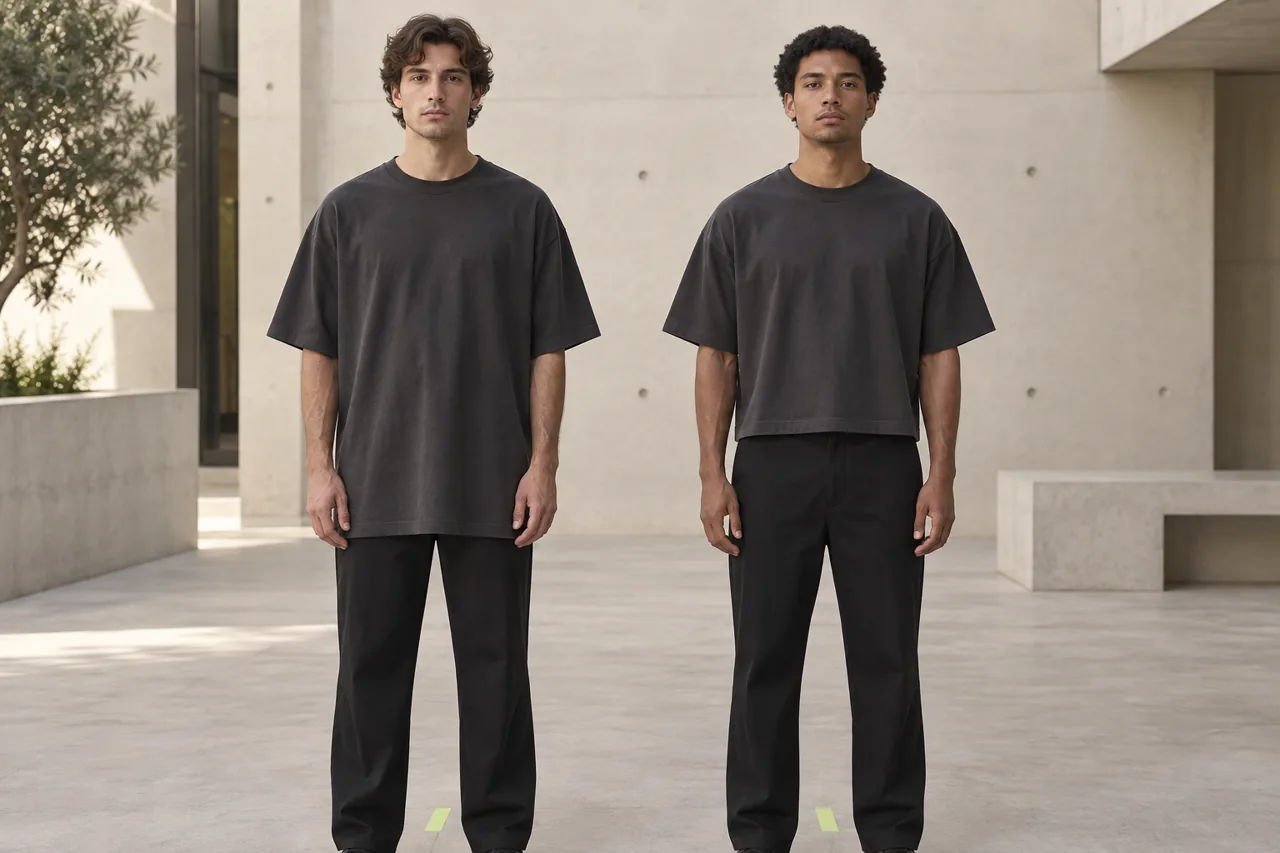
Start with two questions, not two labels
Ask how much room the garment should provide, then ask what outline it should create. The first question concerns the relationship between garment and wearer. The second concerns width, length, shoulder position, sleeves and hem together.
A long, loose tee can be oversized without looking especially compact. A short, broad tee can look boxy while still giving plenty of room. A boxy style also does not have to expose the waist: a brand can choose a shorter proportion that still meets its coverage brief.
The overlap is visible in retail language. For example, UNIQLO's T1BOXY product description identifies a boxy silhouette and an oversized fit on the same garment. That is an example of the terms being used together, not a universal measurement standard or a specification to copy.
Write the intended result in ordinary language before selecting the final product name. “A broad tee that ends near the upper hip, with a relaxed sleeve and a neckline that stays close to the neck” gives the development team more to work with than “make it boxy”.
Compare the decisions that change the result
Use the following as a discussion guide. These are common design directions, not mandatory definitions. The approved sample and written measurements should decide what your brand actually sells.
| Decision | Roomy, longer direction | Broad, compact direction | What to approve |
|---|---|---|---|
| Body outline | More length may emphasise a relaxed vertical fall | Shorter length relative to width may emphasise a squarer outline | Front, side and back silhouette |
| Hem position | May extend farther over trousers | May finish closer to the waistband or upper hip | Coverage while standing and moving |
| Shoulder | A dropped shoulder can reinforce the roomy look | A dropped shoulder can also support a boxy outline | Seam position on the intended wearer |
| Sleeve | Length and volume can create a loose frame around the arm | A wide opening may balance the compact body | Sleeve end position and opening |
| Neckline | Needs its own deliberate size and shape | Also needs an independent decision | Opening, comfort and appearance |
| Styling | Consider layering and how much fabric collects at the hip | Consider trouser rise and how the hem meets it | The intended outfit, not just a hanger |
| Size range | Roominess should remain intentional in each size | Compact proportions should remain coherent in each size | Representative size samples |
There is no need to force every choice into one column. Your collection might need a broad body with a moderate length, a controlled shoulder and a generous sleeve. Describe that combination directly instead of trying to make a supplier infer it from a trend label.
Separate body width from body length
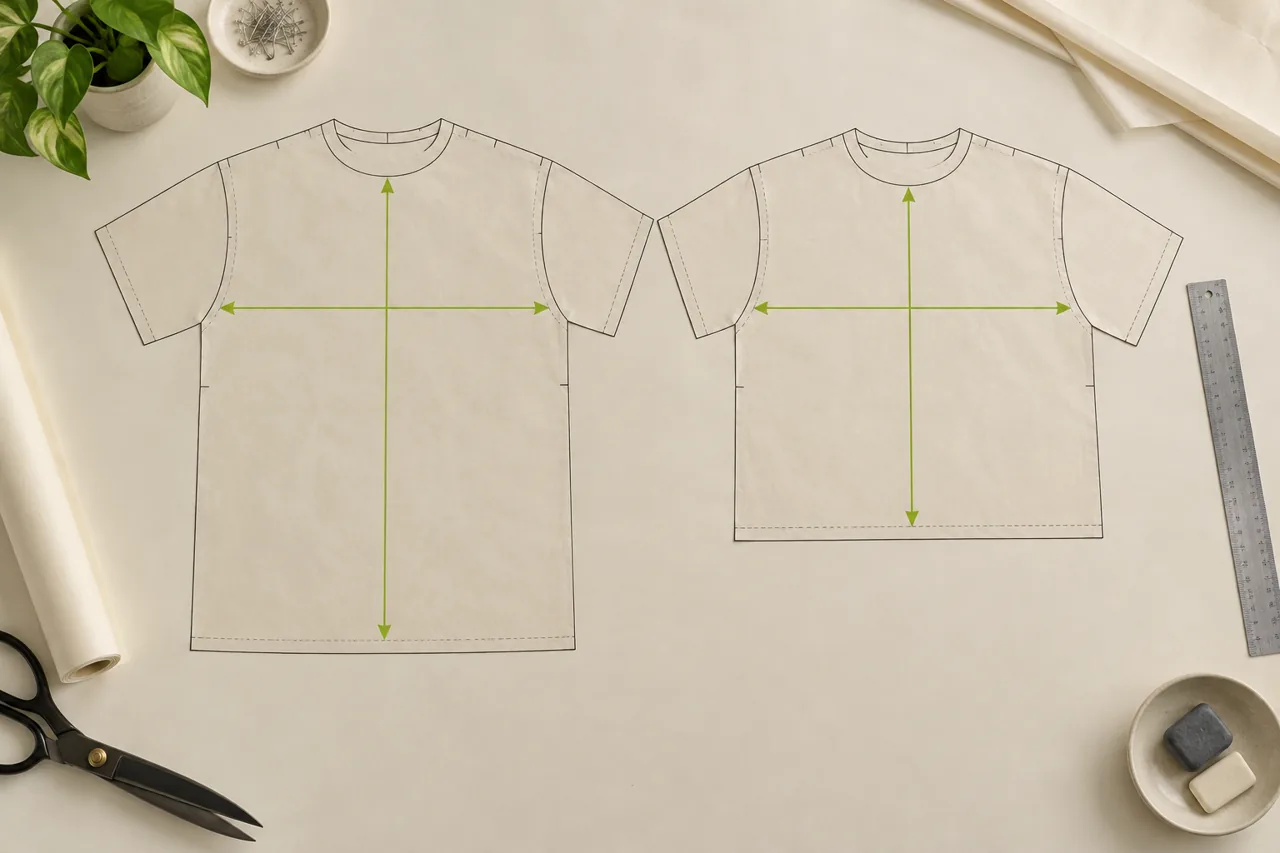
Lay the reference garment flat without pulling it into shape. Agree where the chest width is measured and which point starts the body length. Record whether a figure is a flat garment width, a garment circumference or a body measurement. Mixing these descriptions can make two apparently different specifications describe the same thing—or make matching numbers describe different things.
As an illustrative comparison, suppose two samples share a flat chest width of 62 cm. One measures 76 cm in body length and the other 66 cm using the same agreed method. The shorter sample has a different width-to-length relationship even though the chest measurement has not changed. These figures are examples only, not recommended sizes or Athletic Rush specifications.
Do not select the final fit from that pair of numbers alone. Shoulder width, armhole shape, sleeve dimensions and the wearer's proportions still matter. The comparison simply helps isolate what shortening the body changes.
Also keep the measuring method visible. A length measured from a high shoulder point is not automatically comparable with one measured down the centre back. Have the supplier identify the exact points with a simple sketch or annotated photograph, then use those points throughout development.
Do not create the fit by changing the size label
Buying a larger regular-fit T-shirt can add room, but it also changes other dimensions according to that style's grading. It does not prove that the neckline, sleeve length and body length will match the oversized silhouette you intended.
For a brand developing a new product, treat deliberate fit as a pattern decision. Choose a reference size, define the intended wearer and evaluate the sample in that context. Avoid approving a garment because a larger size happens to look good on one person when the customer-facing size label will say something else.
The same caution applies when trying to create a boxy fit by taking length off an existing tee. The shorter body may need a fresh review of the hem opening, sleeve balance and artwork position. A simple alteration can be a useful exploration, but it is not automatically a finished production specification.
If you already have a successful fit, tell the supplier which parts must remain. “Keep the accepted chest and neckline, explore a shorter body, and review the sleeve balance” is a clearer starting point than a general instruction to redesign everything.
Review shoulders and sleeves as a connected shape
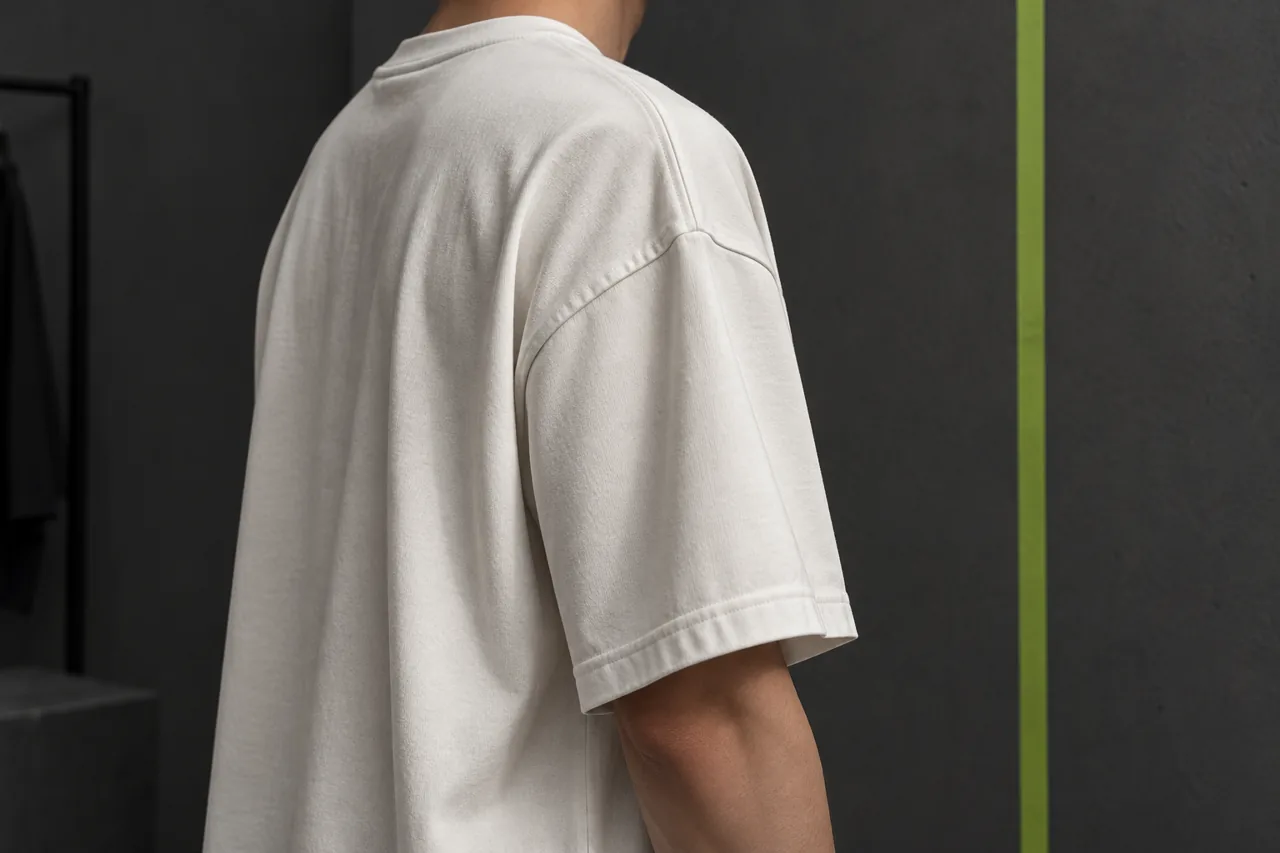
A shoulder seam placed farther down the arm changes where the sleeve begins. That means sleeve length measured from the seam needs to be interpreted alongside shoulder position. Two sleeves with the same stated length can finish at different places on the wearer if their starting points differ.
Review the complete outline with the arms relaxed. Does the sleeve point outward more than intended? Does its opening look balanced against the body width? Does the seam sit at the desired position rather than appearing accidental?
Then move. Ask the wearer to reach forward and raise the arms comfortably. Note where the garment pulls, where it folds and how it returns to rest. These observations help identify questions for the pattern maker; they are not a substitute for their assessment of the pattern and construction.
Avoid changing shoulder width, sleeve length and opening all at once unless the development team can explain the relationship. A small sequence of controlled revisions is often easier to evaluate than one sample containing several unexplained changes.
Decide where the hem should sit during real wear
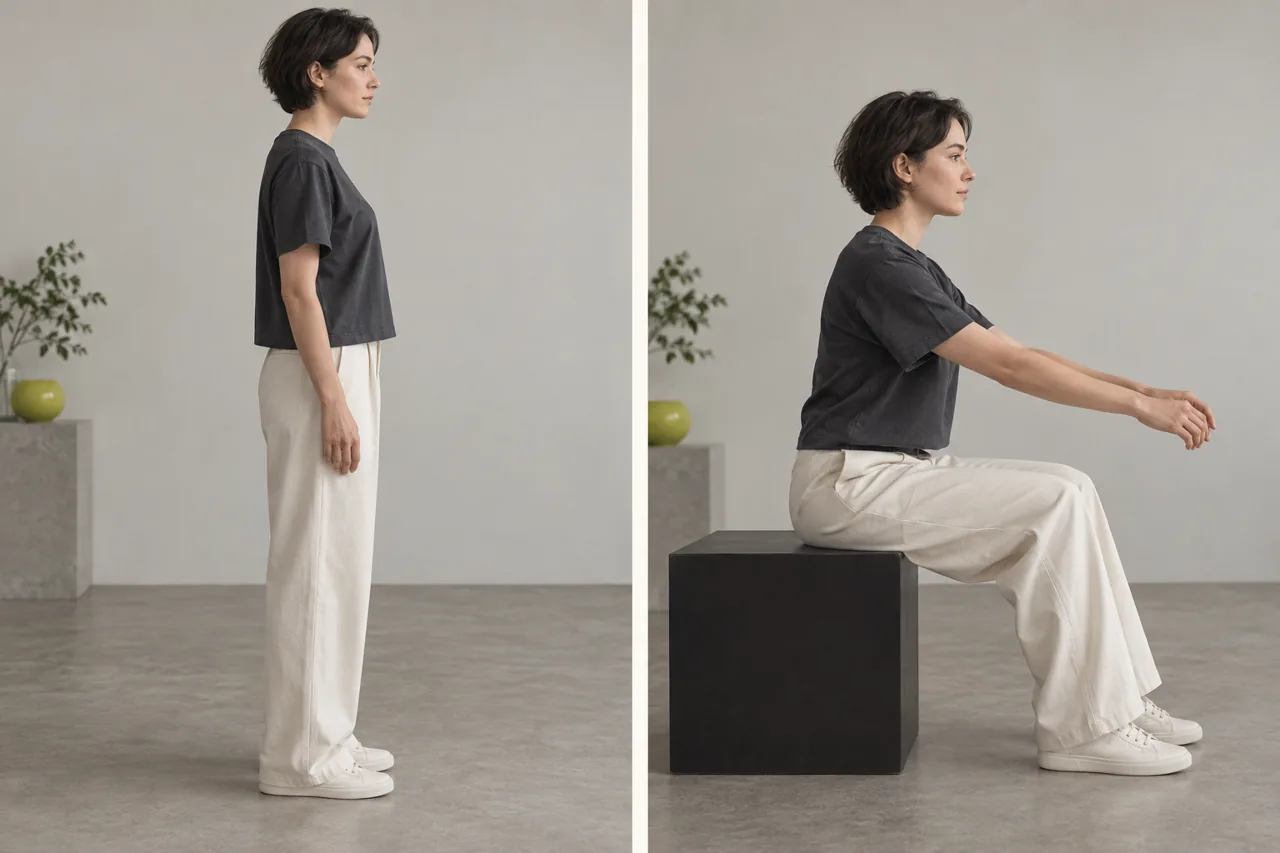
Choose the trousers or other bottom garment that represents the intended styling. Waistband height affects how a shorter tee looks and how much overlap remains during movement. The same tee can appear quite different with a high-rise trouser and a lower-rise one.
Review the wearer standing, seated and reaching forward. Check the side and back as well as the front. If the product is intended to maintain coverage, make that an explicit acceptance point. If it is deliberately cropped, describe that honestly in the product information.
Photograph the sample without tucking, pinning or pulling the hem into position unless that styling is the product's intended use. A carefully arranged image can hide an issue that appears as soon as the wearer moves.
Write the observation before proposing a solution. “The back hem lifts above the intended coverage point when seated” is actionable. “It looks wrong” is not. The supplier can then discuss whether length, balance, opening or another part of the construction needs attention.
Keep fabric and decoration from confusing the fit review
Compare early silhouette options in the same proposed material where practical. A change in drape can alter the apparent outline, so changing material and pattern together makes the cause of a difference harder to identify.
This does not mean fabric approval is separate forever. Once the direction is promising, review it in the actual proposed fabric, colour and decoration. A graphic or embroidery application can affect how a particular area feels and sits. Assess the real combination rather than assuming a plain development sample covers the finished style.
Use the oversized T-shirt fabric selection guide for the separate material decisions. Keep its fabric reference linked to the fit sample so the final approval is tied to a specific combination.
For artwork, confirm position on the accepted garment shape. A graphic placed well on a longer body may sit too close to the hem after shortening. Review the visual relationship on the sample rather than transferring a placement number without checking its starting point.
Check whether the silhouette survives across sizes
One attractive reference-size sample is a starting point, not evidence that every size will look as intended. Discuss a size-sample review with the supplier, including representative sizes across the range and any sizes that present a particular proportion concern.
Look for the design idea rather than identical appearance on every body. Is the smaller size still intentionally roomy? Does the larger size retain the desired length-to-width balance? Are neck and sleeve openings appropriate for their intended wearers?
Do not add the same amount to every measurement and assume the result will work. Agree a graded specification with the development team, then check samples against it. Keep garment measurements separate from any recommended body-size information you plan to publish.
Record who wore each sample, the sample size and revision, and any relevant fit observations with their consent. For customer-facing photography, useful model and garment-size information can help explain the fit; it should be accurate and connected to the photographed sample.
Turn comments into one clear revision brief
A useful fit comment has four parts: the sample being reviewed, the observation, the desired outcome and the items that should remain unchanged. This makes it easier to understand the request without losing decisions that were already accepted.
For example: “On sample B, revision 1, the body width gives the intended room. The back hem sits lower than our reference while standing. Please propose a shorter body that retains our seated coverage requirement. Keep the accepted neckline and confirm whether the sleeve balance needs another review.”
That comment deliberately does not invent the technical correction. The pattern maker may need to examine more than the hem. Ask them to explain the proposed revision and identify any linked measurement changes before comparing the next sample.
Collect comments in one dated record. If one person approves the sleeve in a message and another later requests a different shoulder, resolve the relationship before production. A string of partial approvals can leave the supplier unsure which version is final.
A short approval record for your collection
Keep a photograph set and measurement sheet with the final physical reference. The aim is to preserve the design decision, not merely to collect paperwork.
- Identify the style, reference size, sample revision and intended wearer.
- Describe the desired silhouette and hem coverage in one short paragraph.
- Record the agreed measurement points and garment measurements.
- Attach front, side and back photographs in natural standing posture.
- Record movement observations and any conditions for approval.
- Link the proposed fabric, colour, neckline and decoration references.
- Confirm which representative sizes have been reviewed and what remains open.
- Record the dated final decision and retain the accepted sample.
If the sample is approved only for silhouette, state that limitation. Decoration, care results or a remaining size review may still be outstanding. Before bulk production, have both sides confirm that the final approval applies to the complete proposed garment.
Questions clothing brands often ask
Can a T-shirt be oversized and boxy?
Yes. A tee can have generous room around the body and a broad, compact outline. Use the terms to introduce the look, then confirm the dimensions and physical sample.
Does boxy always mean cropped?
No. A relatively short body can create a boxy appearance without being intended to expose the waist. Agree the hem position and coverage for the actual wearer and styling.
Is sizing up the same as designing an oversized fit?
Not necessarily. Sizing up follows the proportions of the original style. A purpose-developed oversized tee lets the brand decide the body, shoulder, sleeve and neckline relationships together.
Should the sleeve become shorter when the body becomes shorter?
There is no automatic rule. Review the sleeve against the new body outline and shoulder position. Keep or change it because it supports the design, not simply because another measurement changed.
Which fit should a new streetwear brand choose first?
Start with the intended customer, outfit and collection identity. Develop a focused reference rather than several nearly identical variants. If two directions remain plausible, compare controlled samples and document why one serves the product better.
What should I send to request a sample?
Send reference images you have permission to use, the intended silhouette, available garment measurements with their measuring method, preferred material, colours, artwork direction, size range, planned quantity and target date. Identify which decisions are fixed and which need development advice.
Bring a clear fit direction to the sample discussion
Explore Athletic Rush streetwear T-shirt development, then send a concise brief explaining how you want the garment to sit and move. A reference is most useful when you explain what to retain and what to change.
Email kamran@athleticrush.co, message WhatsApp, or request a quote. Confirm sample scope, availability, cost and timing with the team before placing an order.