 Sialkot, Pakistan
Design streetwear shorts around the complete outfit and intended wearer, then translate that direction into a repeatable garment brief. Decide where the hem should sit, how much volume belongs in the seat and thigh, and how the opening should look beneath the chosen top. Approve those decisions in the actual material on a physical sample. A long inseam, a wide opening or the word “oversized” cannot describe the whole design by itself.
For a clothing brand, the first useful question is: what role should these shorts play in the collection? A relaxed knit pair worn with a boxy tee, a clean woven pair beneath an overshirt and a long, broad pair styled with an oversized T-shirt can require different proportions. Start with one clear direction rather than asking a manufacturer to combine every feature from a mood board.
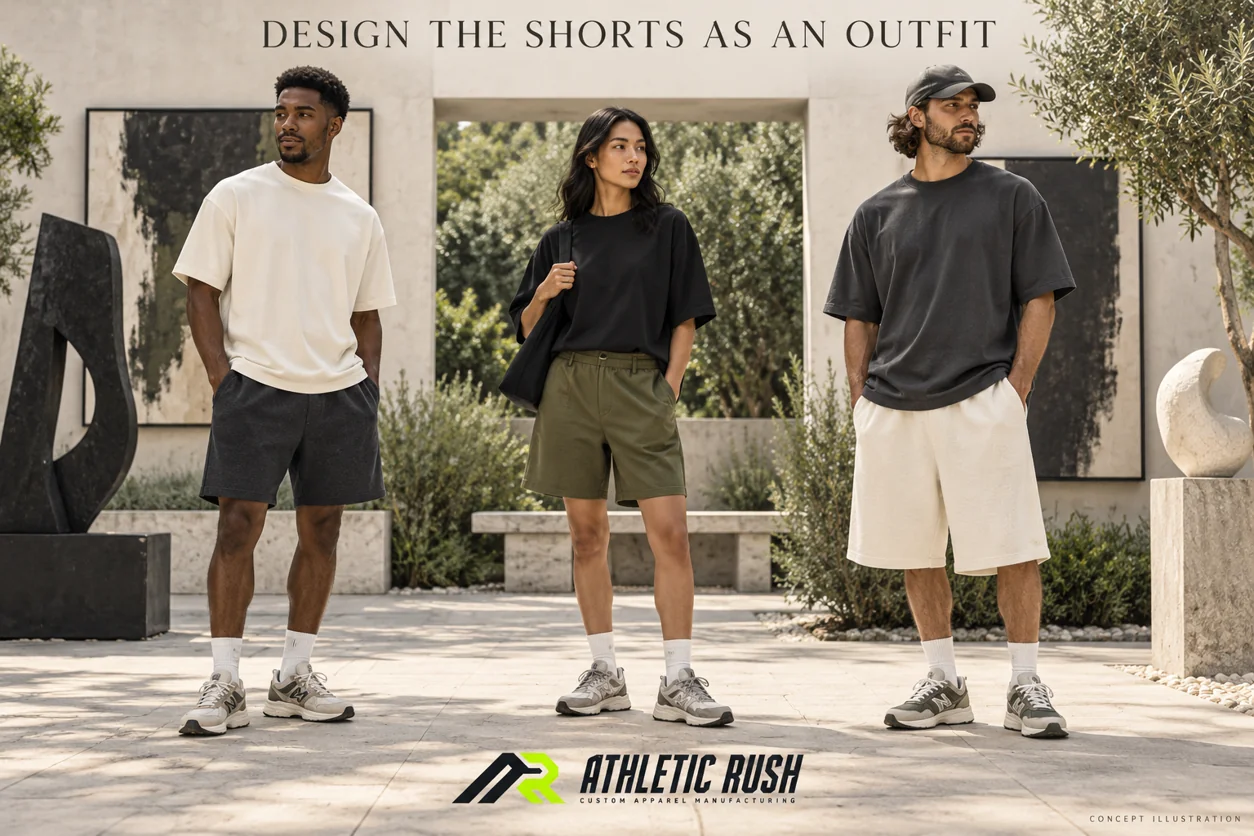
These six original images are conceptual illustrations of design choices and review methods. They are not photographs of Athletic Rush inventory, customer orders or measured tests. Garment descriptions below are illustrative proposals, not offered product specifications.
Choose the shorts as part of an outfit
Give the design a specific job
Describe the customer, ordinary wearing situation and collection role before listing construction details. “Summer streetwear” leaves many questions open. A buyer who wants a clean outfit for everyday city wear may prioritize a particular front outline; another may want the visible volume of a loose knit short beneath a longer top. Neither description proves comfort or performance. Each establishes an outcome to develop and inspect.
Three hypothetical briefs make the differences clearer:
| Proposed style | Design direction to explain | Decision the sample must resolve |
|---|---|---|
| Charcoal relaxed knit short with an ivory boxy tee | Visible room through the seat and thigh, a comparatively straight leg and an above-knee hem | Whether the volume reads as deliberate at the accepted waistband position, with the top worn normally |
| Olive woven short with a black tee or open overshirt | A defined front outline, near-knee hem and a specified opening | Whether the actual material and complete construction create the chosen shape in front, side and back views |
| Ivory long, broad short with a charcoal oversized tee | A longer lower section and a broad leg, with enough shorts remaining visible beneath the top | Whether the top length and shorts hem communicate the intended outfit rather than obscuring each other |
These are working descriptions, not standardized categories or recommended lengths. Add a sketch and mark the intended hem position on a reference-wearer photograph. “Above the knee” is a visual direction; a manufacturer still needs agreed garment measurements and a sample to show what that means for your customer.
Keep the reference images purposeful. One may explain length, another the upper-leg outline and a third the styling context. Label which feature matters in each. If their waist positions, materials or shapes differ, identify those differences instead of treating all three photographs as one consistent specification.
See what the top hides
A long T-shirt can conceal much of a short's upper section. That may be the intended look, but it can also prevent the buyer from seeing the garment being reviewed. Keep two kinds of photographs: an ordinary outfit view with the intended top, and a clear garment view that makes the waistband and upper fit visible.
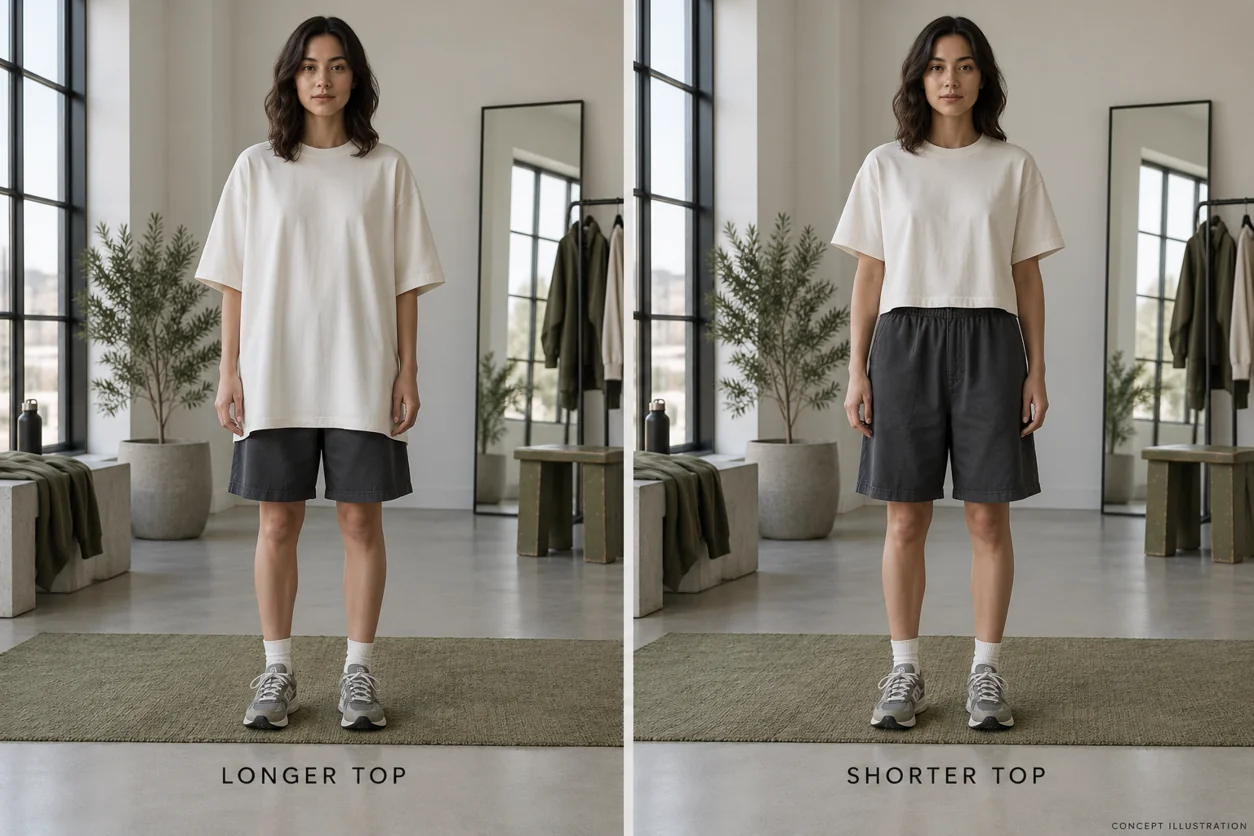
The illustration compares styling relationships. It does not establish which outfit suits a particular body or prove that the shorts measurements are identical. For an actual development comparison, identify the same sample, wearer, waistband position and camera conditions so the change you are assessing is clear.
Decide how much of the shorts should remain visible beneath the top and whether the side view supports that decision. Review the front, side and back before accepting the outfit. A top that looks suitably short from the front may cover more of the garment at the back. Likewise, a wide stance or hands held in pockets can make the leg appear broader than in an ordinary standing view.
Our oversized versus boxy T-shirt guide explains the separate top-proportion decision. Use that chosen top as context; do not assume “oversized shorts” should simply mean ordering a larger size. Sizing up may alter waist and upper fit as well as the visible leg.
Select a material proposal, not a fabric nickname
“Cotton shorts” identifies a fibre reference but does not describe the whole fabric. Ask the supplier for composition, construction, mass, finish and an identifiable material reference. Retain a physical swatch alongside the proposed garment. A knitted short and a woven short may both use cotton while presenting different surfaces and construction choices.
CottonWorks explains in its knit basics that knitted structures are formed from intermeshing yarn loops; its weaving basics describes woven construction through interlaced warp and filling yarns. These construction distinctions help identify a material. They do not supply the stretch, drape or care result of your proposed shorts.
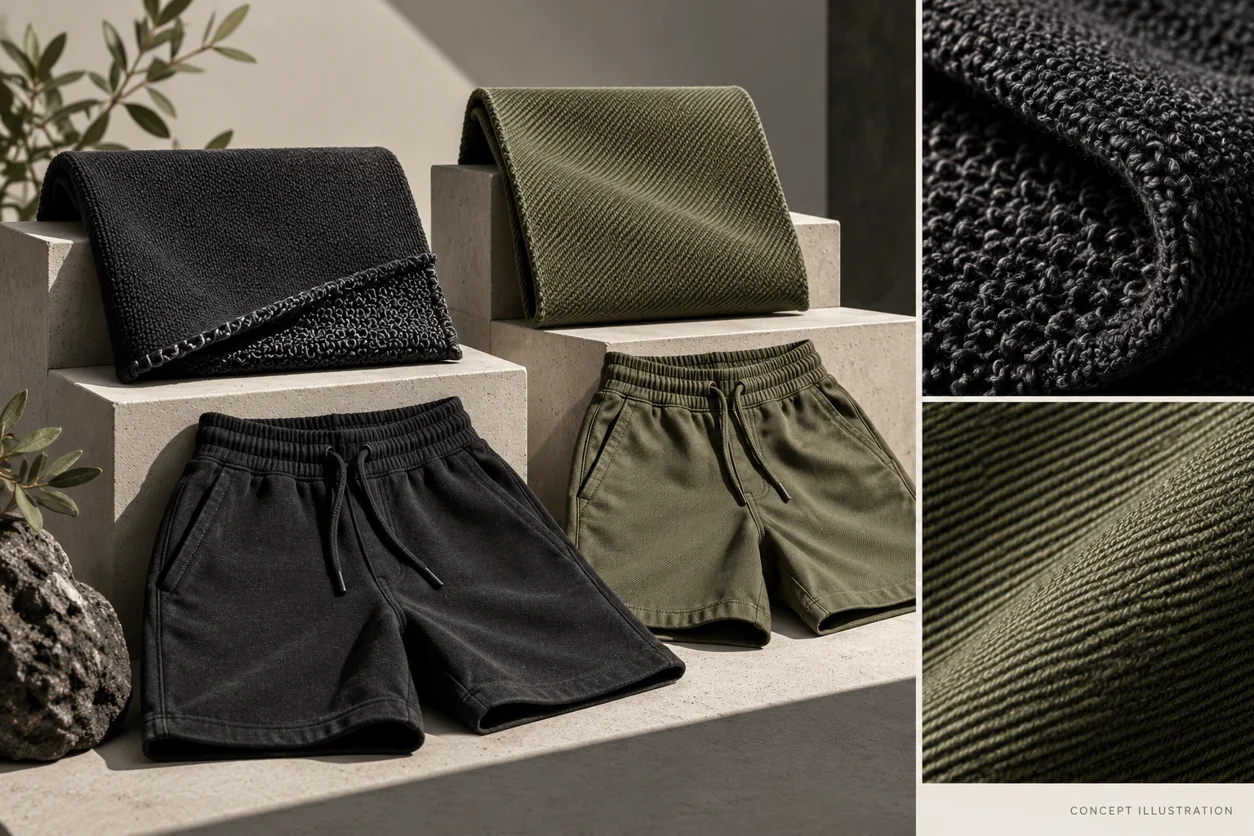
For a charcoal loop-back knit proposal, review the visible leg shape and how the complete garment sits during wear. For an olive woven proposal, inspect the actual outline and material response in the same ordinary poses. Do not claim that one route is always softer, stronger, cooler or more suitable for streetwear. The named category is only the starting point for an identified sample.
When comparing materials, control the relevant pattern and review conditions, or disclose their differences. If one prototype has a different rise, length and opening as well as a different fabric, the comparison is between two complete garments. That can be a useful choice, but it cannot isolate a fabric effect.
Turn the outfit direction into a garment brief
Separate length from volume
Choose the intended waistband position first. Then describe the hem position and the distribution of room through the seat, thigh and opening. A shorter hem can coexist with a broad leg; a longer short can have a restrained opening. These are separate decisions that must work together.
Ask for a front outline showing the leg direction. Do you want a fairly steady line, visible narrowing or a wider lower section? Explain where the volume should be apparent. The supplier should show how the proposed pattern connects those areas rather than treating “make it baggier” as permission to increase every measurement.
For example, a brand might accept the waistband fit and seat of a charcoal short but want more visible room through the upper thigh. Its request should identify that concern while retaining the accepted areas. If the supplier proposes related rise or lower-leg changes, record those too. A pattern is a connected proposal; an isolated width instruction does not explain every consequence.
One reference size is not a size range. State the customers and sizes you intend to serve and agree which physical samples should be reviewed. A chosen hem position on one wearer does not establish the same worn relationship for every wearer. Keep body information distinct from the finished garment chart. ISO 8559-1's public abstract concerns body-measurement definitions and their use in clothing development; it does not prescribe a streetwear shorts pattern or a universal allowance for room.
Define what each measurement means
The manufacturer needs a chart whose measuring points can be found again. Name the sample revision, units, start and end points, and relevant garment condition. Do not leave the method in an unlabelled photograph or a separate message that may be lost.
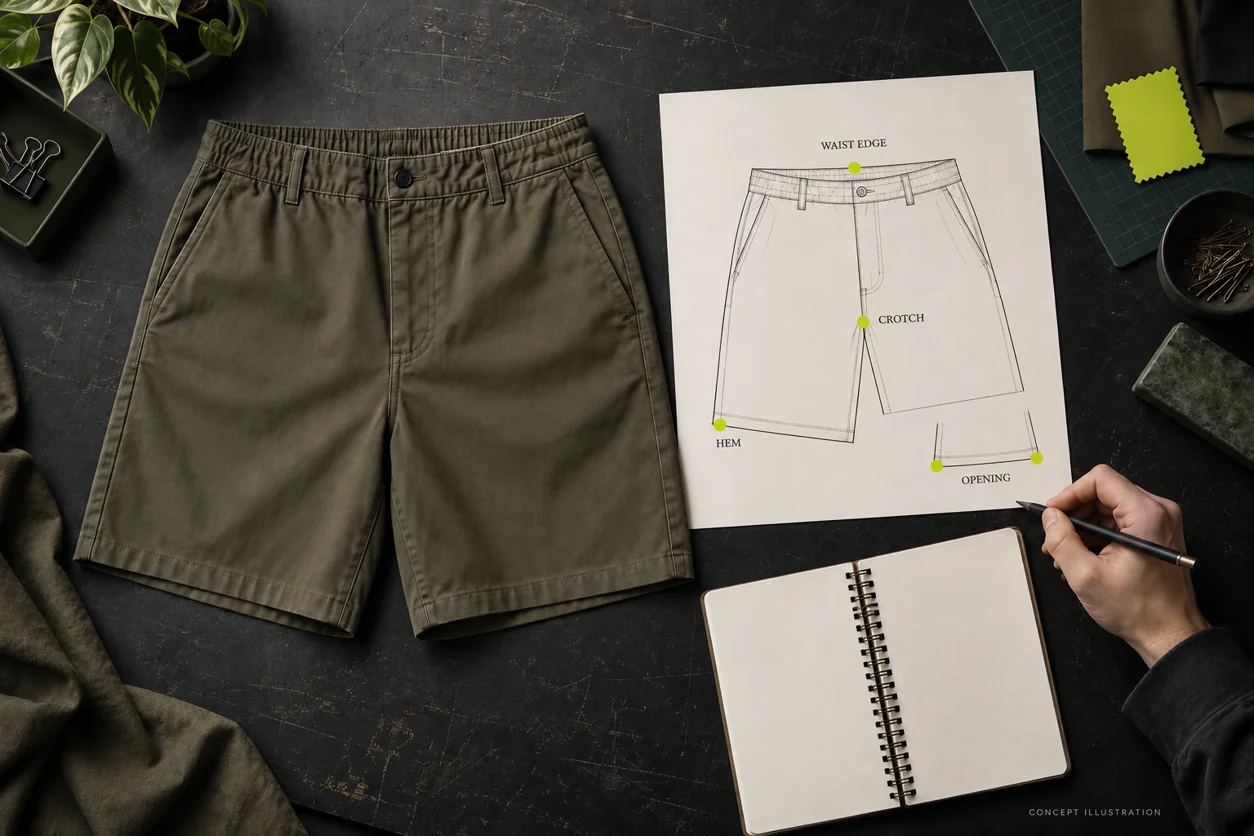
The drawing locates example references. It is not a production pattern or a prescribed measuring path. Agree the actual locations and methods with the supplier for your garment.
For the design brief, identify at least:
- Waistband: the relaxed measuring condition and any separate fit or functional review required. A flat value is not automatically a body circumference or evidence of maximum stretch.
- Rise and upper section: the named front and back references and the location used for hip or seat measurements. State whether the waistband is included in the relevant length record.
- Thigh: the exact garment level and direction used for the width. Keep the location on an annotated drawing so two reviewers can repeat it.
- Inseam and side length: the agreed start, end and path for each. Do not compare one with the other as though both were the same “length.”
- Finished opening: whether the value describes a flat width or a separately measured circumference, and how the hem finish is included.
- Condition and revision: the actual material, sample identifier and whether measurements refer to the initial or agreed after-care state.
A useful notation template is: “Opening: A cm flat at the finished hem; thigh: B cm flat at the marked garment level; sample revision: C.” A, B and C are placeholders. They communicate the record, not suggested measurements. Agree values and tolerances for the actual style rather than taking them from a conceptual image.
Include the intended hem finish. A folded open hem, binding and a split-side proposal introduce different details to review. Show the supplier the selected construction and ask for a complete sewn example. If the design includes a slit, identify its location and the wearing situations in which its appearance should be checked. Avoid changing that detail late without reviewing the resulting outline.
For more detail on measuring and reviewing the finished lower edge, see our trouser length and leg opening guide. Apply its method-definition principle to the shorts; do not transfer a trouser's approved values to a different garment.
Make decoration support the chosen shape
Once the outline is clear, locate artwork on the actual shorts panel. A graphic near the hem needs a defined reference to the finished edge and side seam; a position on a folded flatlay is not a complete placement approval.
Review final-size artwork on the chosen material, then view it on the worn sample. Check whether the top covers the mark, whether folds interrupt it and whether its relationship to the hem remains intentional. Do not use a rendered mock-up as evidence that the final application will behave the same way.
If the design has a side split, panel join or contrast binding, show its relationship to the artwork. Ask the supplier to identify any placement conflict before sampling. Across sizes, decide whether artwork dimensions and placement remain fixed or need another treatment, then review the affected proposals. Avoid assuming that one approved size answers the whole range.
Pocket depth, bag attachment and detailed internal construction deserve their own specification review. At this stage, identify the pocket type and visible shape needed for the design so it can be sampled accurately. A strong silhouette concept should not be treated as approval of every hidden assembly detail.
Compare the sample fairly and make a clear decision
Start with an ordinary standing view
Record the sample size, revision, material, reference wearer and waistband position. Photograph front, side and back with pockets empty, the chosen top and footwear. Keep a separate clear garment view where styling conceals the upper section.
Compare the sample with the annotated brief. Look at the hem relative to the intended knee reference, the visible volume through the upper leg and the direction towards the opening. Note whether left and right hems appear consistent under comparable standing conditions. A visible concern is a reason to inspect the garment and measurements, not proof of a particular pattern fault.
Use the pockets as intended in a separate check and document any resulting change to the silhouette. A phone or hands in the pockets can affect the visible outline. Keep that view distinct from the empty-pocket reference so the supplier can understand what changed.
Check sitting and stepping, then return to standing
Ask the wearer to sit on an ordinary chair, take a comfortable step and stand again. Choose actions relevant to the proposed collection. Record where the wearer reports pressure or restriction and what happens to the waistband and hem. A broad opening alone cannot establish the upper-fit result.
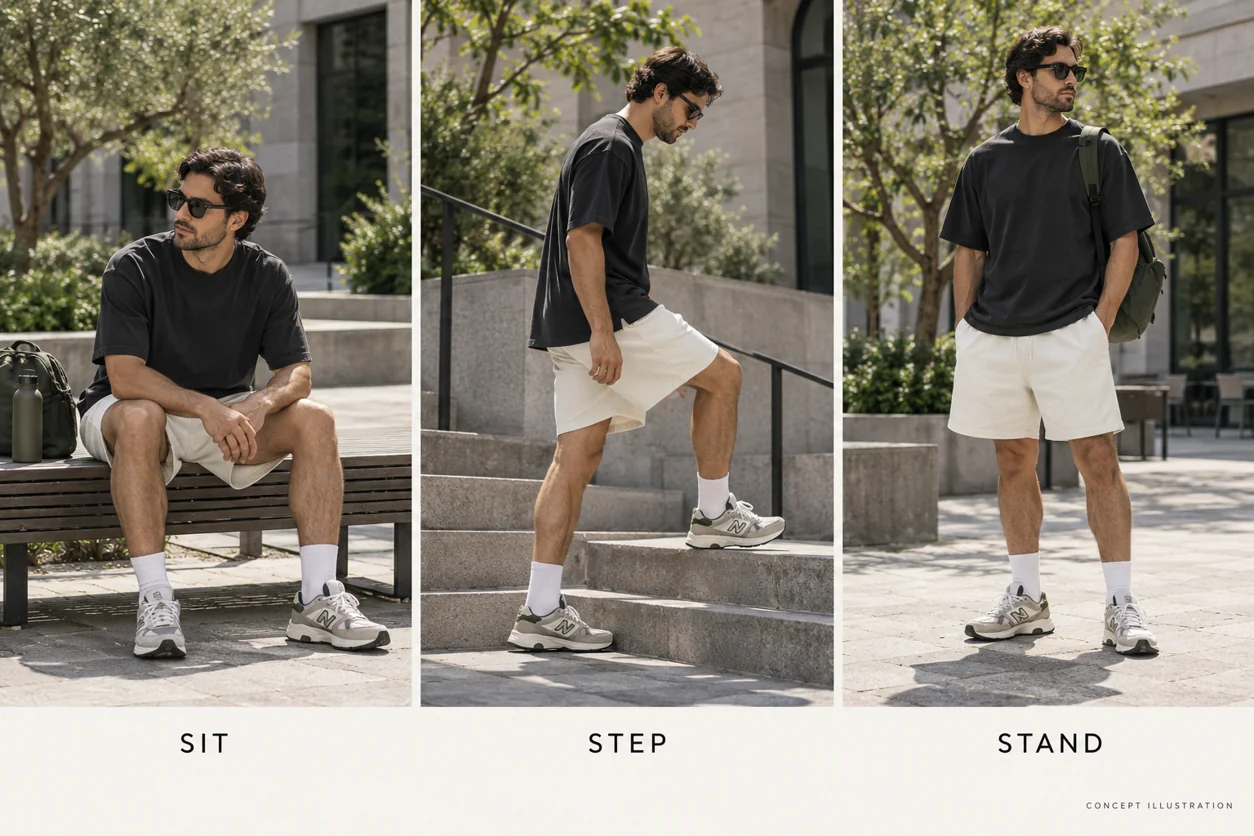
Review the coverage that matters to your intended customer while seated, especially for shorter or split-hem proposals. Describe the observation in neutral terms and ask whether it meets the brief. The point is to agree the intended wearing outcome, not to invent a universal correct coverage rule.
After movement, let the shorts settle before taking the reference photograph. Note whether the wearer had to adjust the waistband or manually arrange the hem. These are practical fitting observations, not laboratory comfort, stretch or durability tests.
If care review is required, identify the agreed procedure and retain separate initial and after-care garment records. Check the worn outline in the relevant condition instead of assuming a swatch or an initial fitting establishes the finished garment result. Any formal testing or specific performance claim needs appropriate evidence for the actual material and construction.
Change one defined proposal instead of starting over
Useful feedback tells the supplier what you observed, the desired outcome and the features already accepted. Ask for an explained proposal and review it on the next identified sample. Avoid sending “shorter and better” with no reference to which part of the design needs work.
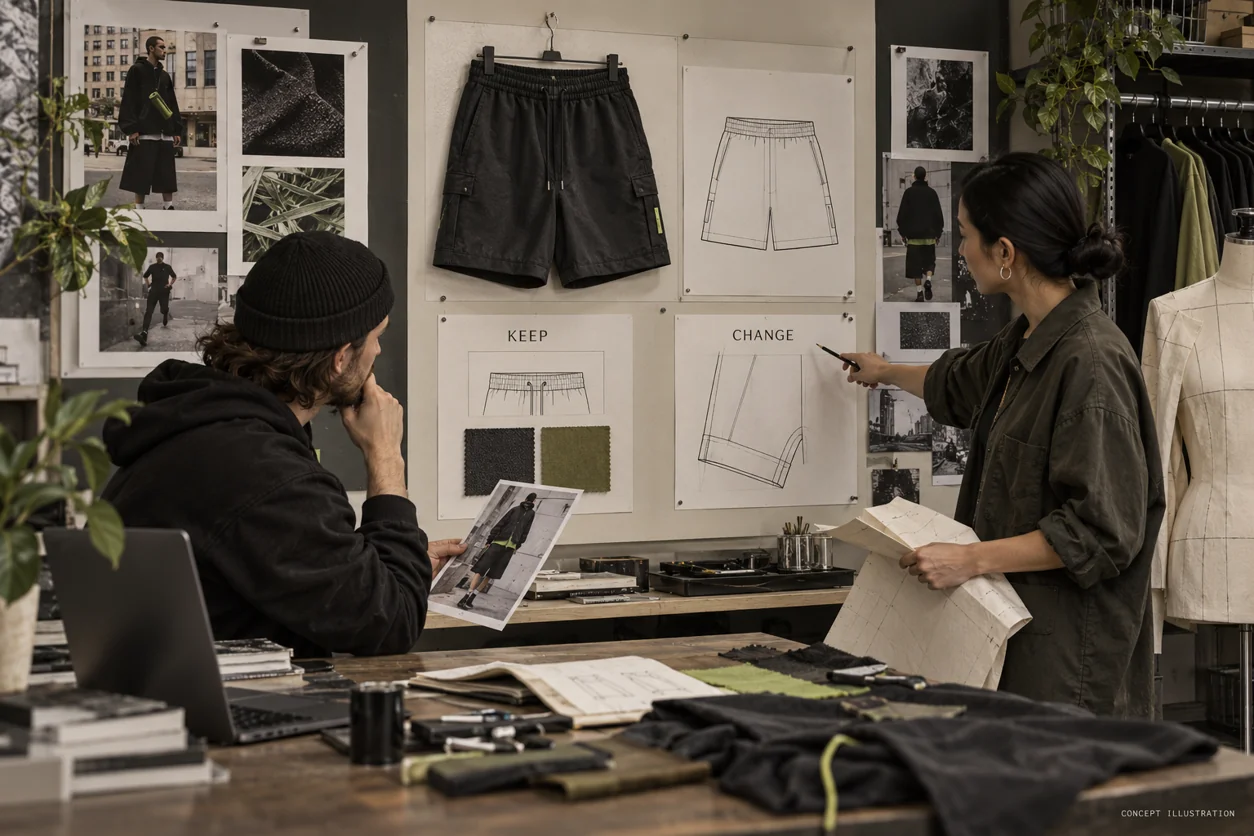
| Observation on the identified sample | Clearer revision request | What to inspect next |
|---|---|---|
| The longer top hides more of the shorts than the collection reference intended | Compare the agreed top relationship and propose the necessary shorts or styling change; identify which garment is changing | Ordinary outfit views and a separate clear garment view |
| The waist and seat are accepted, but the upper leg looks narrower than the marked drawing | Explain a coordinated thigh and leg-outline proposal while retaining the accepted waist and material | Revised chart plus comparable front, side and back photographs |
| The desired hem position is visible only when the wearer raises the waistband | Reassess the length at the intended wearing position and retain that position in all review records | Finished length record and ordinary standing and seated views |
| One material comparison also uses a different rise and opening | Identify it as a different complete garment proposal, or arrange a controlled material comparison | Clearly named samples and a list of the conditions that differ |
For a fictional charcoal-short revision, a buyer could write: “The material and waistband position are accepted. The front view has less upper-leg volume than our marked outline. Please explain the proposed pattern changes, identify the measuring points affected, and retain the accepted hem direction unless a related change is needed. Supply the revised sample with comparable photographs.”
This comment gives the maker a reviewable problem without pretending to diagnose the technical solution. If the correction changes length, material or hem construction too, make those changes explicit before approval.
Retain the final chart, material reference, artwork placement, selected sample revision and review photographs together. State what the approval covers and which size-range, care or construction checks remain outstanding. A general “design approved” message should not hide an unresolved requirement.
Questions buyers ask when designing streetwear shorts
Is there a best inseam for streetwear shorts?
There is no universal value that defines the category. Choose the intended wearer, waistband position, hem outcome and outfit relationship, then set garment measurements and review the sample. Two shorts with the same inseam can still differ in rise, opening, material and worn appearance.
Can I make shorts oversized by increasing the size?
A larger size may alter the waist and upper fit as well as the leg. Define where the design needs more room and which areas should remain accepted. Ask the supplier to develop that silhouette rather than use the size label as the whole brief.
Should I choose knit or woven shorts for a streetwear collection?
Either can be developed within a streetwear direction. Identify the actual material and compare complete samples against the chosen outfit and use context. Construction names help explain the proposal; they do not prove a particular drape, care result or level of comfort.
Should the T-shirt be approved with the shorts?
Review the complete outfit if its relationship is part of the collection concept. Also retain a clear shorts-only garment view and specification. Styling approval and garment approval answer different questions, so keep both records identifiable.
Send a shorts brief that can be developed
Bring one chosen outfit direction, an annotated shorts outline, customer and size-range context, an identifiable material proposal and defined garment measuring points. Add the intended top and footwear, artwork references and a short list of the sample decisions still to resolve.
Athletic Rush develops custom apparel from Sialkot, Pakistan. Explore our streetwear shorts development page, then send the proposed shorts brief to kamran@athleticrush.co or WhatsApp +923279008337. A clear outfit direction and an identified physical sample give the brand and manufacturer a concrete design to discuss before bulk production.