 Sialkot, Pakistan
How do you specify a garment-washed look without leaving it to guesswork?
Describe the finished garment you want, identify the physical reference, and separate its overall colour, local contrast, surface appearance and feel. Then develop that brief on the proposed garment assembly with an identified process route and traceable sample revisions. “Vintage wash” is a starting description; it is not enough to tell a supplier where the effect should appear or what variation you will accept.
For a clothing brand, the decision is whether a particular finished T-shirt or hoodie expresses the intended design consistently enough to take into the next production review. A dramatic photograph, a process name and a pleasant fabric swatch answer different parts of that question.
This guide uses two hypothetical projects: an Archive Tee, with a muted charcoal body and visible seam-edge contrast, and a Cloud Hoodie, with a quieter warm-grey surface and restrained contrast around the pocket and hood. They are development examples, not Athletic Rush inventory, customer orders or reported wash results.
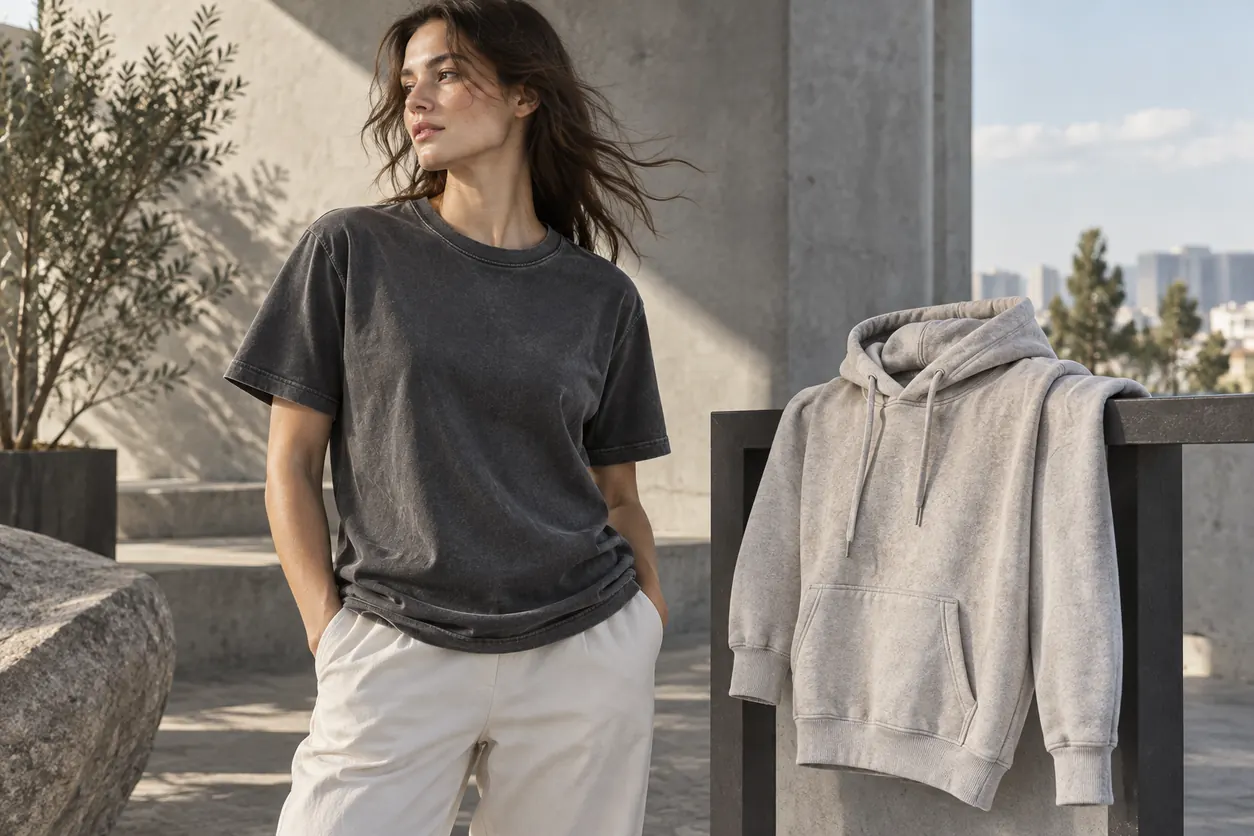
Concept illustration: the garments show two aesthetic directions. They are not tested before-and-after specimens or a catalogue of available finishes.
Turn the reference into four separate design decisions
A reference garment can contain several attractive features at once. If you simply ask a supplier to copy its “washed effect,” the wrong feature may become the priority. The overall shade might move in the right direction while the seam contrast becomes too strong, or the surface may look right while the garment feels unlike the reference.
Start by describing these four decisions separately.
1. Overall body colour
Identify the colour seen across the main body, away from obvious seams and highlights. Is the Archive Tee intended to read as dark charcoal, a lighter grey or a warm faded black? Choose the physical reference area that controls this decision.
A close-up of a pale hem should not become the colour target for the entire body. Likewise, a photograph taken in strong side light should not silently replace the retained garment as the target. State which physical reference controls, and use photographs to show locations and context.
If the base shade is still unresolved, use our colour sample approval guide to establish the reference hierarchy. For a washed look, also identify the final finished garment state you are trying to achieve; a colour submission for an earlier stage is not the whole aesthetic approval.
2. Contrast and its location
Describe the relationship between the main body and the areas that should look different. For the Archive Tee, the desired lighter edge may belong at the neckline, sleeve hem and bottom hem. The broad chest can remain relatively quiet.
For the Cloud Hoodie, decide whether the pocket opening, hood edge, cuffs and hem should share one restrained effect or have distinct roles. Do not assume that “matching” means every component must look identical. Write down the intended relationship so an intentional rib contrast is distinguishable from an unwanted mismatch.
3. Surface pattern and intensity
Separate a mostly even muted appearance from a visibly mottled body, local cloudy areas or a sharply defined effect. These are design choices. Avoid treating them as a ladder in which the most dramatic version is automatically better.
Say where a quiet area matters. A large chest graphic may need a less visually busy background, while a plain tee might rely on more noticeable surface variation. That is an artwork-and-garment decision to inspect on the complete proposal, not a reason to assume one named wash suits every design.
4. Feel
Describe feel through an identified physical reference and an actual comparison. “Soft” can refer to different impressions: a smooth face, a less crisp body, a particular inside surface or the way a garment hangs.
A photograph can show the intended appearance but cannot establish hand feel. Ask for a finished sample you can handle. Record the material identity and finishing state with your comments, so a later change in fabric does not get mistaken for a simple change in the wash effect.
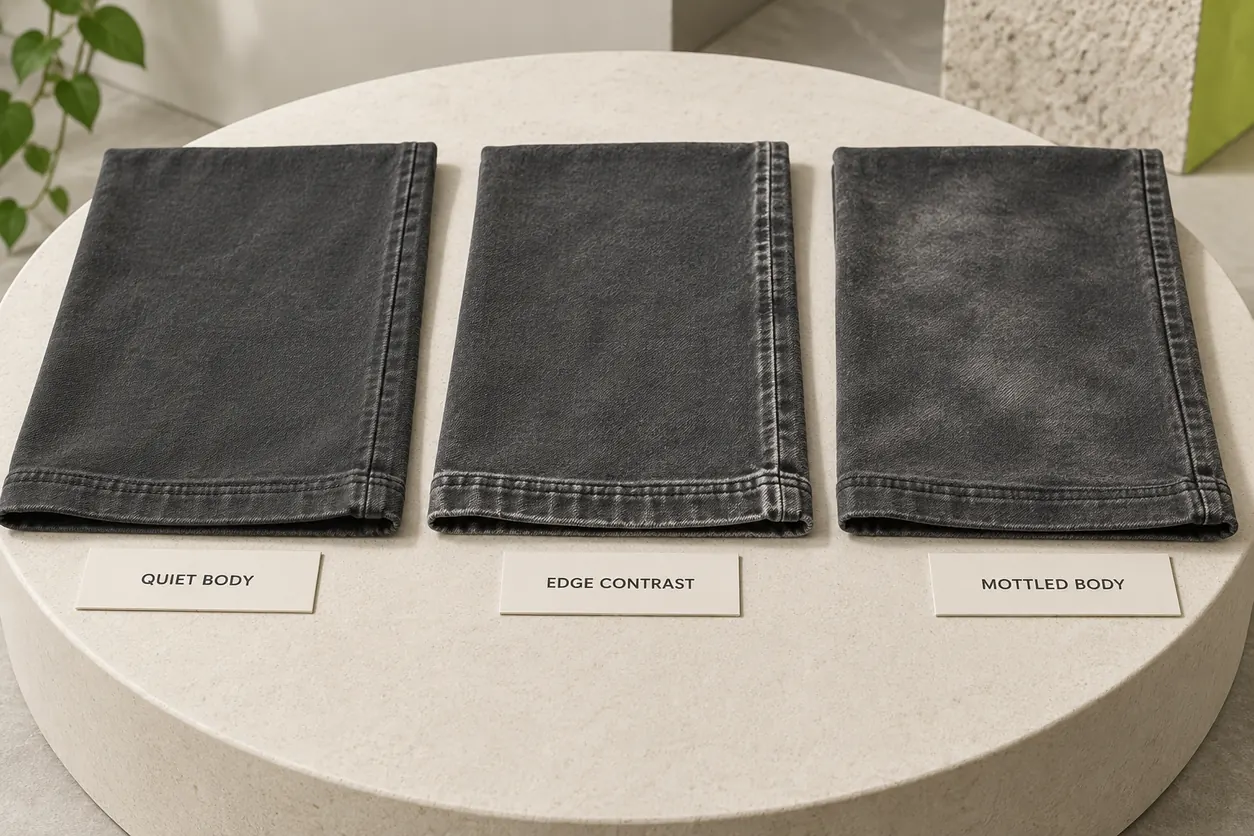
Concept comparison: the labels describe visible design directions. They do not identify the processes used, measured tolerances or a best-performing sample.
A wash name is not a complete process specification
Ask the supplier to translate a proposed name into a clear description of what will be done to this material and garment. Keep the desired appearance in your brief, but let the qualified processor identify a suitable development route and explain its limits.
CottonWorks notes that wet-finishing names can describe an appearance, a processing sequence or a marketing identity. Its garment-finishing resource is largely about denim; an indigo-denim example should not be transferred directly to a cotton jersey tee or fleece hoodie. This is a useful reason to ask what a supplier means by the name, rather than ordering from the name alone. CottonWorks garment finishing.
The same resource explains that cellulase treatments can act on cotton surface fibres and that the result depends on the substrate and processing conditions, with possible material loss. “Enzyme washed” therefore does not, by itself, establish the final appearance or physical properties of your garment. Ask what treatment is proposed and what evidence will be supplied for this particular development.
Use this distinction when reading a proposal:
| Wording in a proposal | What the buyer still needs to establish | Useful next question |
|---|---|---|
| “Vintage” or “washed look” | The intended appearance, locations, feel and reference | Which finished physical example represents our target? |
| “Garment dyed” | The colouration stage and the separate finishing steps | When is colour applied, and what happens afterwards? |
| “Enzyme wash” | The specific purpose and proposed route for the chosen material | What change is being developed, and how will the finished sample be assessed? |
| “Pigment effect” | The actual colourant application and the intended surface result | What is applied, where, and how will appearance and feel be reviewed? |
| “Distressed” | Whether visible abrasion, fraying or holes are actually part of the design | Which locations and types of alteration are authorised? |
These are questions to resolve with the supplier, not interchangeable recipes or promises of equivalent results.
CottonWorks distinguishes dyes from pigments: pigments are insoluble colourants applied with a binder, rather than penetrating fibres as dyes do. Its explanation also links binder use with fabric hand. A pigment-based proposal should therefore be identified accurately and reviewed physically, instead of being treated as another name for any faded garment. CottonWorks dyeing basics.
Keep the recipe and the acceptance brief connected
A buyer does not need to invent chemical concentrations, temperatures or processing times. The processor needs an appropriate technical route. The buyer needs to know which route the sample represents, which garment assembly it was applied to and what outcome is being reviewed.
Ask the supplier to retain the development process identifier and relevant production records. Your acceptance brief should point to the sample and finish map, rather than reduce a complex effect to a universal number of minutes in a machine.
Do not infer environmental benefits, strength, colourfastness or long-term consistency from a fashionable wash name. Any such claim needs its own relevant evidence for the proposed product and process.
Draw a finish map before requesting another sample
A finish map is a front-and-back garment drawing with short notes identifying the intended appearance by area. It is especially useful when an effect should be restrained in some places and stronger in others.
For the Archive Tee, the map might say: maintain a quieter central body, retain visible neckline and hem-edge contrast, and exclude deliberate holes or frayed edges. For the Cloud Hoodie, it might say: review front and back together, keep pocket-edge contrast understated, and assess the hood, rib and body relationship on the assembled sample.
These are hypothetical design instructions, not technical settings.
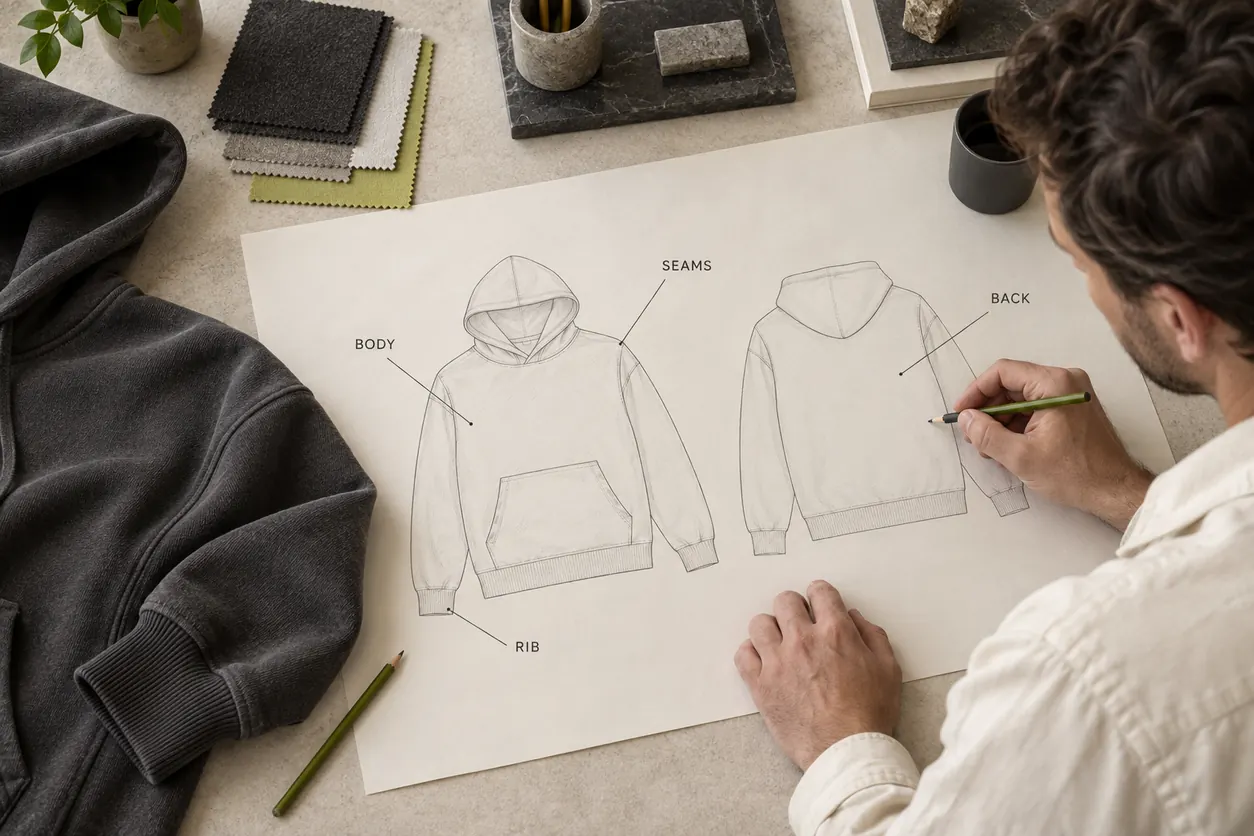
Concept illustration: the drawing identifies regions to discuss. The unshaded sketch is not a measured colour standard or an approved production pattern.
Include the parts that a front photograph misses
Show the back, side areas, hood interior where relevant, pocket edges and intended visible inside surfaces. State whether a local effect should continue around the garment or remain limited to a named region.
If only the front is approved, the supplier has little guidance about the back. If a finish changes sharply at a side seam, ask whether that boundary belongs to the design rather than accepting it simply because the front looks attractive.
Annotate the map with short positive instructions. “Keep the central chest visually quiet” is more useful than “not too much wash.” Pair an exclusion with a location: “No deliberate holes at the neckline or hems” tells the reviewer what to check.
Decide what is fixed and what may vary
Separate the design features you want controlled from the variation you are willing to consider. For example, the Archive Tee may require a particular overall charcoal direction while allowing some irregularity in broad-body shading.
Avoid approving unrestricted variation with “every piece is unique.” That wording can make it difficult to distinguish the intended aesthetic from a piece you would reject. Ask for physical examples that demonstrate the proposed range, and discuss each important feature rather than assuming one sample defines every boundary.
A single attractive garment does not demonstrate the distribution of effects across a production lot. A collection of conceptual images does not do so either.
Develop the complete garment assembly
List the body fabric, rib, thread, cords, labels, fasteners and decoration in the proposed sample. Identify any substitute material or temporary trim. The question is not merely whether a loose piece of fabric can look appealing; it is whether the proposed assembled garment expresses the brief.
Our cotton jersey specification guide helps identify a tee material before surface development. For hoodies, the same principle applies to the chosen body fabric and rib: retain enough information to know what was actually sampled.

Concept assembly: these components illustrate items to include in a review. Their materials and different appearances do not represent verified production compatibility.
Confirm the sequence for decoration and trims
Ask when decoration and trim attachment occur relative to the proposed finishing route, and request a sample that represents that sequence. A plain finished tee can help explore the aesthetic, but it does not settle the appearance of a decorated production proposal.
If the Archive Tee will carry a cream chest graphic, review that graphic with the final-looking body. Decide whether the graphic should remain visually clean, participate in an aged aesthetic, or use another explicitly defined treatment. Do not infer the choice from the word “vintage.”
Similarly, decide which labels and fasteners must appear in the representative hoodie sample. If a component is added later, record that boundary and require the appropriate follow-up review. An omitted component is a pending question, not evidence that the assembly has passed.
Distinguish a material experiment from a garment proposal
If the objective is to compare two finishing approaches, ask whether the material, construction and starting state can be held constant. Identify the variables that changed.
If the supplier proposes a different fabric and a different finish together, assess them as two garment proposals. You can choose the combination you prefer, but you cannot attribute every visible or tactile difference to the wash alone.
For the Cloud Hoodie, a quieter surface on one sample might be accompanied by a different body, rib or construction. Record those differences before writing “wash option B is better.” The more useful decision might be “develop proposal B as a complete garment, subject to the outstanding material and care review.”
Compare the options, then write one clear revision
Review complete samples under the same agreed viewing conditions. Look at the whole garment first, then the marked regions. Handle each proposal and compare the intended visible faces. Keep sample identifiers attached throughout the review.
Use photographs as a record of an observation and its location. Include a whole-garment view as well as the close-up, so a small edge detail is not mistaken for the whole effect. Record the physical sample that the photograph represents.
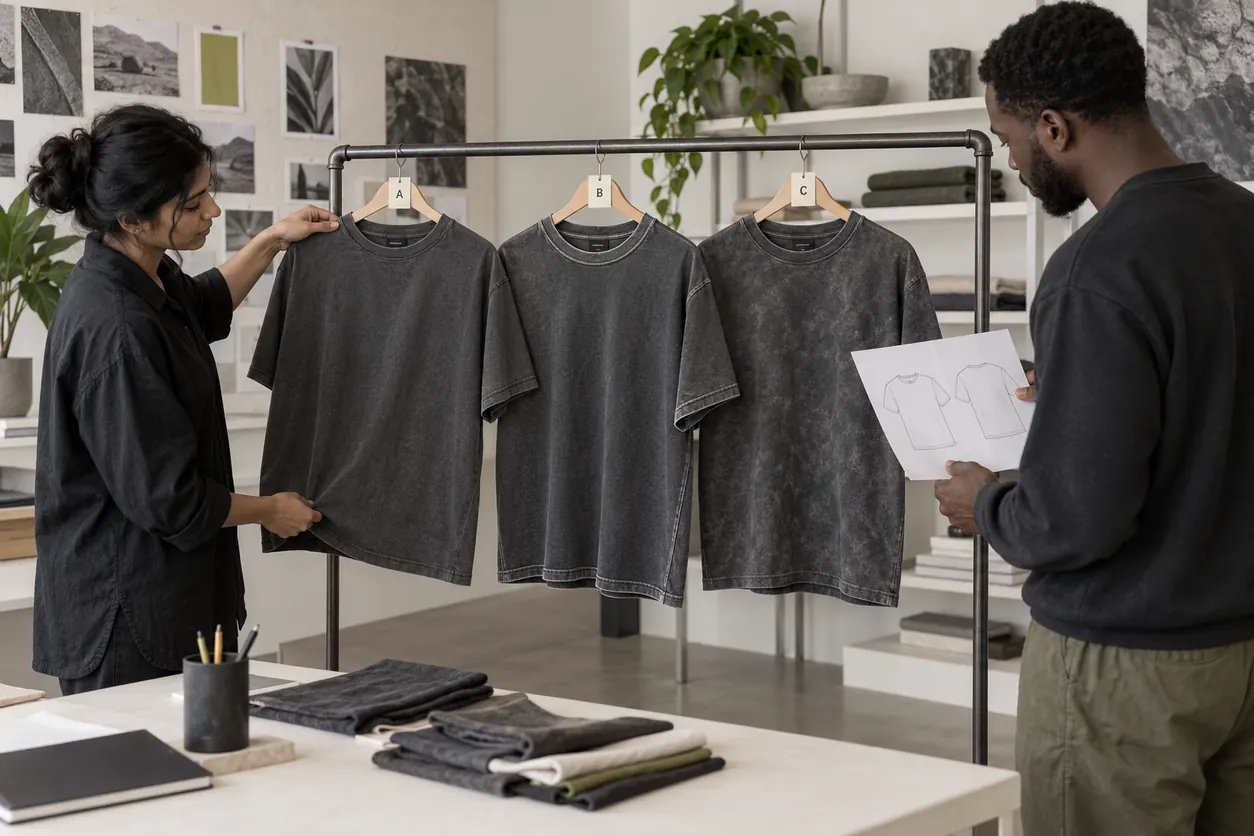
Concept review: A, B and C are illustrative alternatives. The picture does not show a tested process comparison, an approved range or actual supplier samples.
For the Archive Tee, suppose candidate A has the preferred body appearance, B has the preferred edge contrast and C looks too busy across the chest. Do not simply choose B if that quietly abandons the preferred body. Ask whether the desired combination can be developed, and identify the physical references for each comment.
Keep the next revision focused. If you change the fabric, colour direction, effect distribution and graphic at once, the next sample may be difficult to interpret. Where several changes are necessary, list them explicitly instead of calling the request a minor wash adjustment.
| Observation on the identified sample | Clear revision comment | What still needs review |
|---|---|---|
| Archive Tee body is too pale, but the hem contrast suits the brief | Move the main body towards the retained charcoal reference; preserve the agreed hem relationship for the next review | Complete revised tee and the supplier’s feasibility explanation |
| Chest mottling competes with the intended graphic | Develop a quieter central chest using the marked map; retain the nominated edge effect | Finished garment with the intended decoration sequence |
| Hoodie front is acceptable, but the back has a much stronger effect | Bring the back into the recorded front/back relationship shown by the references | Both sides of the same revised complete hoodie |
| Rib contrast differs from the intended component relationship | Review the specified rib/body assembly against the annotated reference | Actual component identity and complete revised assembly |
| A visually attractive sample has deliberate fraying outside the brief | Remove the unauthorised fraying; identify the locations on the map | Revised locations and any relevant product-quality evidence |
| Appearance is suitable, but feel does not match the retained reference | Keep the selected appearance direction and develop feel towards the identified physical reference | A handled finished sample; photographs cannot settle feel |
The table gives hypothetical comments, not a diagnosis of a specific factory process. Let the supplier explain which technical changes are feasible and what else they affect.
Carry a selected look into production without losing its identity
Retain the selected finished sample and its identifier. Record the material and component specification, finish-map revision, proposed process identifier and the scope of the aesthetic decision. Where a variation range is agreed, retain the actual physical examples and the feature each one defines.

Concept handoff: the folder illustrates reference continuity. It is not a production release, laboratory report or proof of lot consistency.
Before moving from development to a larger production review, ask how the supplier will demonstrate that the proposed route remains suitable at the next stage. Agree the representative garments, relevant sizes or components and lot identification needed for that review. Do not assume a development sample settles a larger batch simply because the process name remains unchanged.
Keep three decisions distinct:
- Design direction: the sample expresses the desired appearance and feel.
- Representative garment review: the identified assembly includes the relevant materials, construction, trims and decoration.
- Production and product-quality acceptance: the agreed evidence and inspections for the next stage have been completed.
An aesthetic selection should state which of these has been decided and which remain pending. It should not accidentally release production or imply that all care and physical-property requirements have passed.
Keep intended finish and later care checks separate
The selected sample should be identified in its finished development state. Later washing and wearing checks answer additional questions about colour, dimensions, shape and the assembled product. Their scope and acceptance criteria need to be agreed separately.
For dimensional review, our T-shirt shrinkage guide explains why defined measuring points and a recorded care procedure matter. Do not assume that a garment-washed appearance means no later dimensional change, or that a pleasing surface proves colourfastness. Those are separate evidence questions.
For a reorder, compare the new proposal with the retained approved physical references and current specification. Confirm material or process changes before treating an older wash name as an unchanged product.
Questions clothing-brand buyers often ask
Is “vintage wash” the same as “enzyme wash”?
Not necessarily. “Vintage” can describe the intended aesthetic, while “enzyme wash” identifies a proposed treatment category. Ask the supplier what each term means for the chosen garment and review the finished physical sample against the actual brief.
Can I choose a washed effect from a photograph?
A photograph can help communicate placement and general appearance. It cannot establish feel or replace an agreed physical reference for the finished garment. Use it as supporting information and identify the sample and viewing context it represents.
Should every garment have exactly the same mottling?
First decide which features must be controlled and what variation is acceptable for the design. Use physical examples and a written scope to agree the range. Do not accept unlimited variation merely because the product is described as washed or unique.
Does approving the look mean the garment is ready for bulk production?
Only if the approval explicitly covers the required production and product-quality decisions. Selecting an aesthetic direction is narrower. Record the complete assembly, remaining checks and next-stage evidence before authorising the wider step.
Prepare a finish brief that a supplier can act on
Bring the reference garment or specimens, identified material and assembly, annotated front/back finish map, proposed decoration sequence and the decision required next. Keep your preferred appearance separate from an unverified process assumption.
For your next streetwear development enquiry, contact Athletic Rush at kamran@athleticrush.co or WhatsApp +923279008337. A clear finished-garment brief helps the discussion move from “make it vintage” to a physical proposal that can be reviewed and revised.