 Sialkot, Pakistan

Your first sweatsuit graphic looks strong on screen: a statement chest, a larger back message and a phrase running down one jogger leg. Why does the manufacturer still need more information? A graphic sweatsuit needs a separate, traceable brief for every artwork zone: exact wording, garment version, actual artwork dimensions, placement reference, proposed decoration method and the sample evidence you will review. A good render communicates the idea; it does not settle those production decisions.
For a new U.S. clothing brand or creator-led drop, the useful next step is to turn the image into a small set of connected decisions. Start with Athletic Rush's streetwear development and manufacturing hub, identify the hoodie and bottom you intend to develop, then work through the graphics together rather than approving each screenshot in isolation.
This guide uses Own Your Path, an original Athletic Rush AI design concept, as a worked example. It is a charcoal hoodie-and-jogger visual study with cream lettering and restrained rust accents. It is not a listed product, available stock, a manufactured sample or a demonstration of a working online editor. The separate catalogue reference below has its own source caption. All other teaching scenes are AI illustrations, not records of customer orders, staff activity or tests.
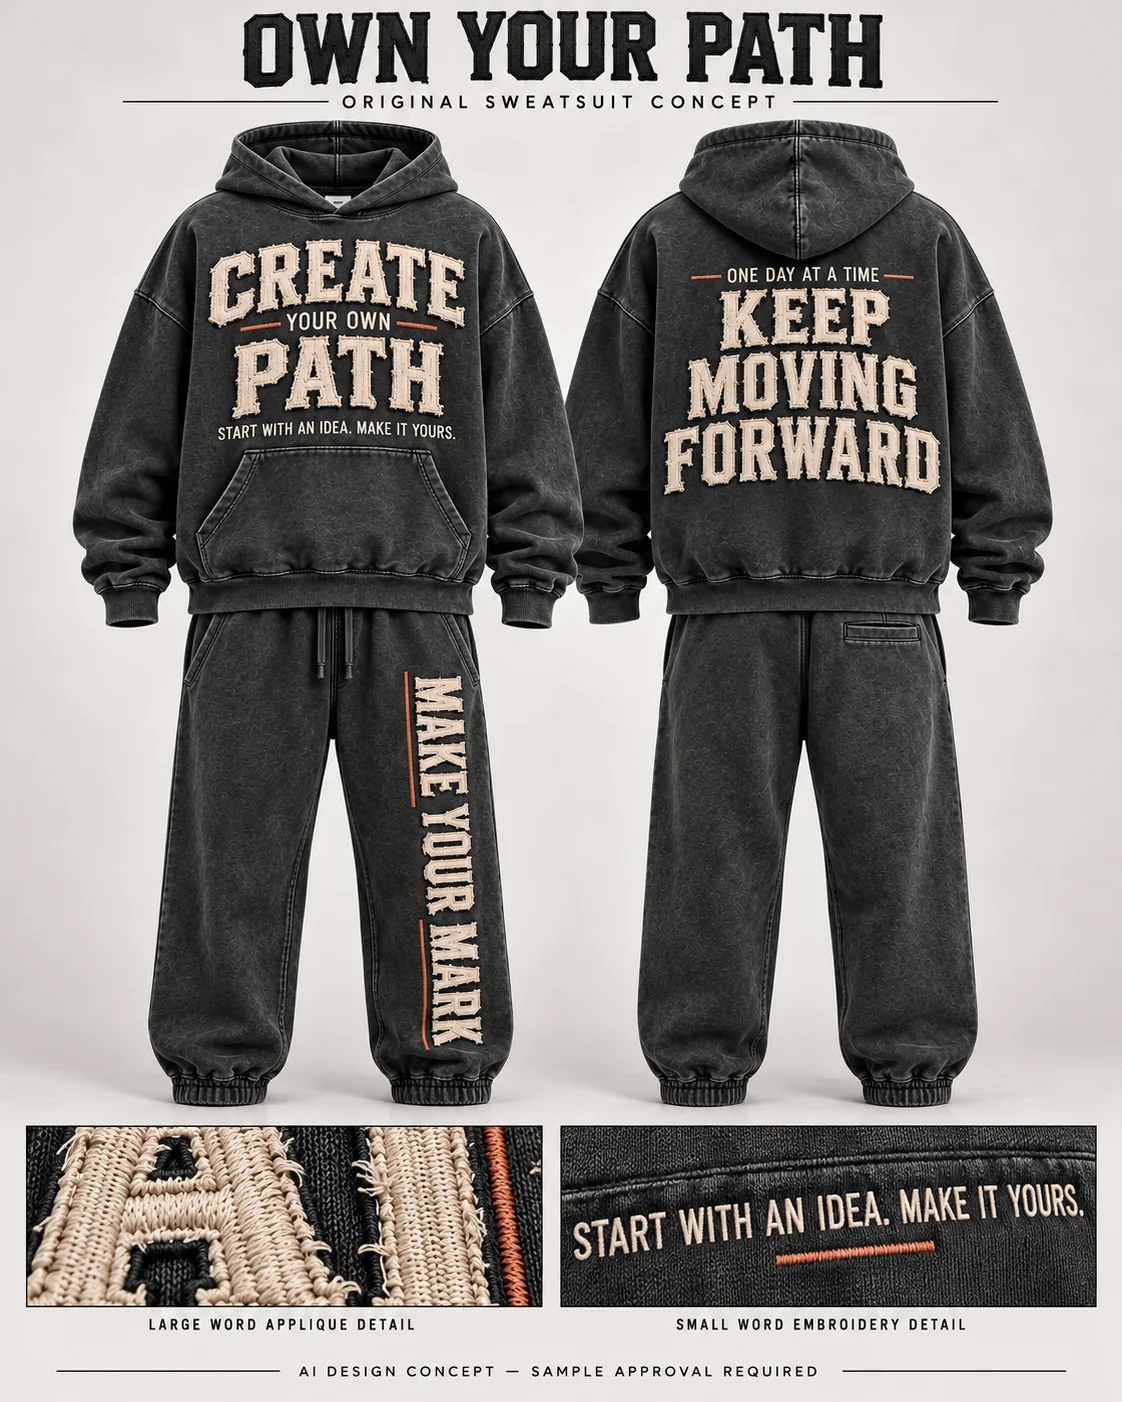
Own Your Path — original AI concept for discussion. Front: CREATE / YOUR OWN / PATH. Back: KEEP / MOVING / FORWARD. Wearer-left leg: MAKE YOUR MARK. The pictured fabric, fit and stitched appearance remain proposals requiring physical sample approval.
Start with the garment that will carry the words
A graphic occupies a garment, not an empty rectangle. The hoodie hood can cover part of the back. The front pocket creates a boundary below the chest. A tapered jogger offers a different artwork area at the thigh and near the ankle. Decide which garment version the artwork refers to before asking someone to make the lettering larger.
Own Your Path proposes a dropped-shoulder pullover, a kangaroo pocket and cuffed joggers. Those visible features are design directions, not a confirmed pattern, fabric composition or weight. Record the proposed body length, hood construction, pocket shape and bottom silhouette in the garment brief. If the fit changes, reconsider the artwork rather than assuming that its earlier position remains suitable.
Athletic Rush catalogue reference: an oversized pullover
Athletic Rush's live Oversized Pullover Hoodie — True Black Pigment Dyed reference provides a useful front-and-back visual starting point. Its pocket, hood and body outline help explain the placement questions. It is a separate catalogue design; it is not the Own Your Path garment, an approved match to its proposed wash or evidence of its construction performance.
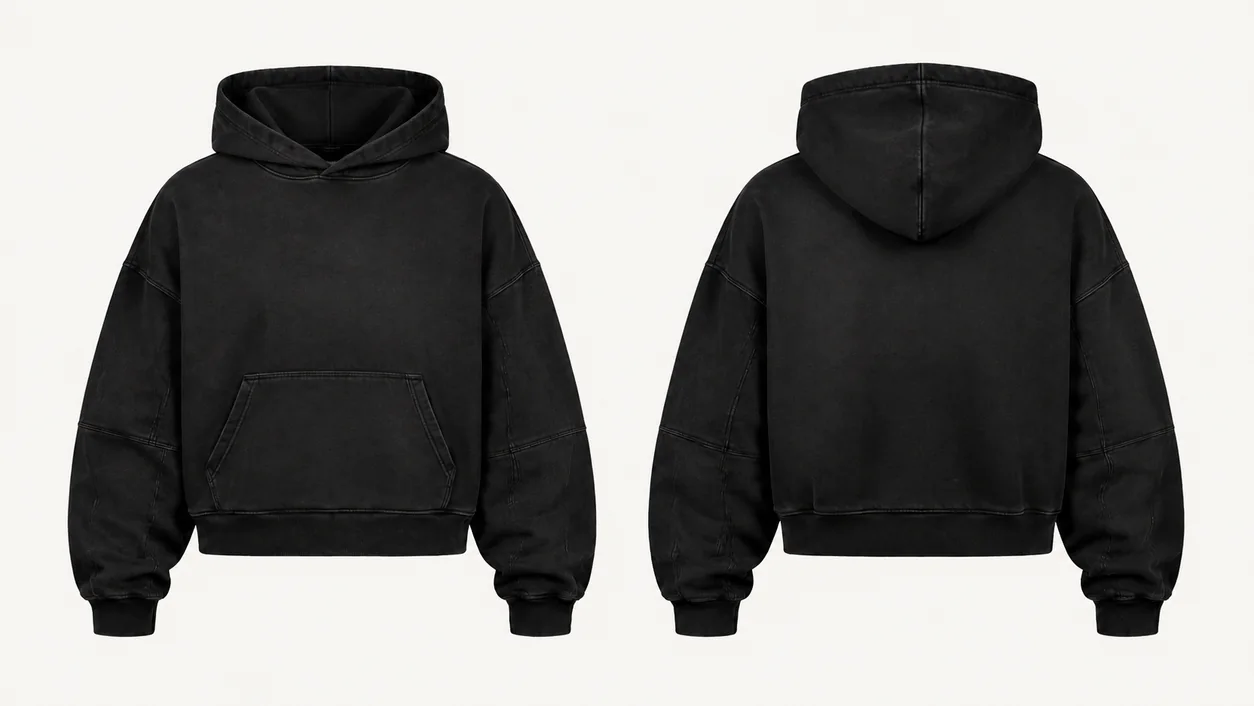
Website catalogue illustration from the Athletic Rush Oversized Pullover Hoodie — True Black page. The original presentation background has been cleaned for this article. This is a design reference, not a photograph of an inspected sample or proof of stock.
Use the Hoodies and Sweats catalogue to compare the actual silhouettes before choosing a reference. A cropped pullover and a longer regular hoodie should not share a placement instruction merely because both are called hoodies. Confirm the exact style and revision in the brief. A catalogue title also does not establish the fabric or finish that will be supplied for your order.
For a first coordinated drop, separate what should look related from what must be physically identical. The hoodie and jogger can share a palette and lettering style while needing different artwork sizes and handling. Athletic Rush's matching hoodie-and-jogger approval guide covers the wider garment relationship; the focus here is how the graphic decisions connect across the set.
Give each artwork zone its own identity
For this illustrative brief, call the front hoodie group F1, the back group B1 and the jogger phrase L1. Keep those identifiers on the artwork export, placement drawing and sample comment. “Make the writing smaller” is ambiguous when three locations contain writing.
Treat each group as a complete composition. F1 includes the large words, YOUR OWN, the short supporting sentence and the small accent marks. Its overall boundary is not just the width of CREATE. The same applies to the small line above B1 and the accent beside L1. A placement drawing should show everything that will actually be applied.
| Zone | Exact concept wording | Garment relationship to resolve | Evidence to request |
|---|---|---|---|
| F1: hoodie front | CREATE / YOUR OWN / PATH; START WITH AN IDEA. MAKE IT YOURS. | Overall width and height, centerline, position above the pocket, clearance from the neckline and seams | Identified actual-size layout, then a decorated garment showing the complete group |
| B1: hoodie back | ONE DAY AT A TIME; KEEP / MOVING / FORWARD | Hood coverage, overall artwork boundary, position on the relaxed and worn garment | Back views with the hood in the agreed positions and the same garment identified |
| L1: wearer-left jogger leg | MAKE YOUR MARK | Correct leg, reading direction, relation to pocket, side seam and cuff, position through the taper | Clearly labelled front view, side/context view and physical placement review |
These are proposed fields for a buyer brief, not approved measurements. Add the actual units, reference size, artwork dimensions and placement values agreed for your garment. If those are not decided, mark them supplier proposal requested rather than leaving a blank that could be interpreted as permission to choose.
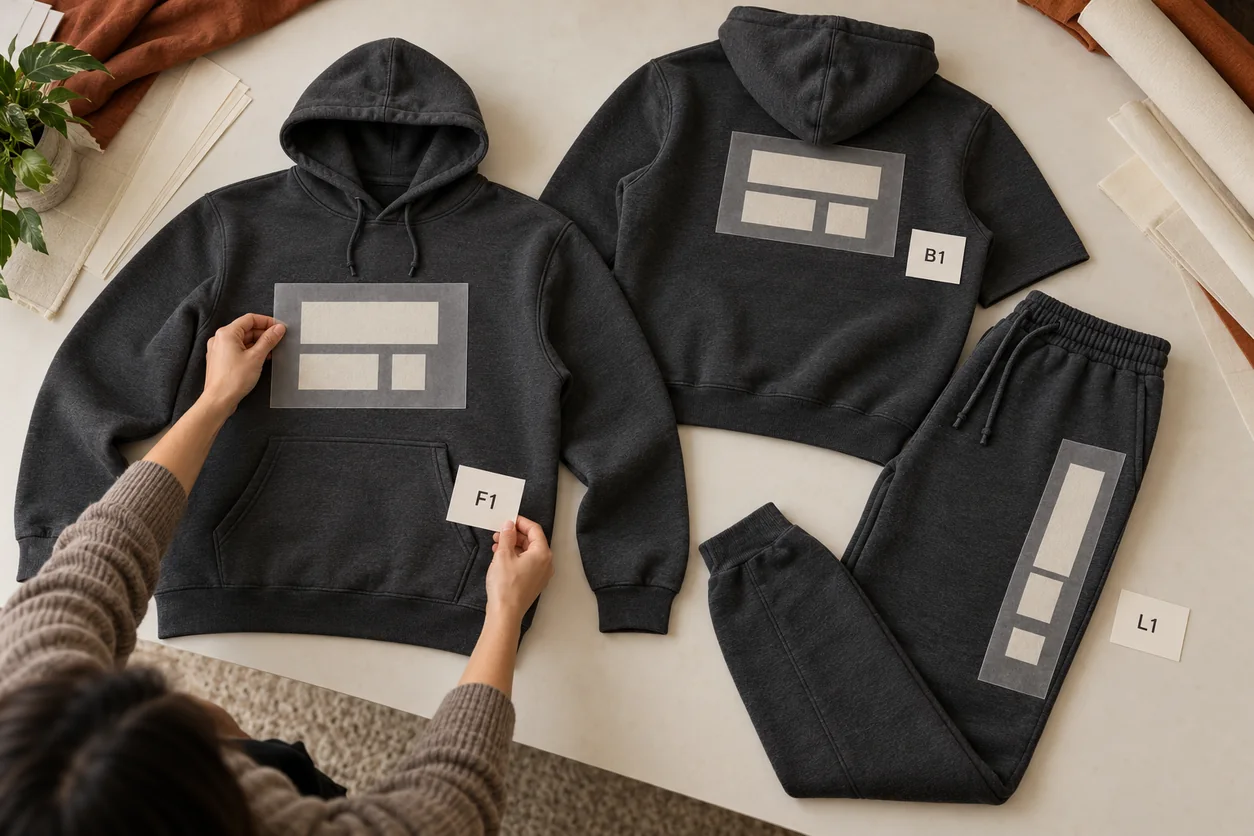
Concept illustration: separate front, back and leg zones before settling their dimensions. Paper overlays represent proposed artwork areas; the scene supplies no measured placement or approved pattern.
A practical front instruction might say: “F1, garment revision G1, identified reference size; centered on the agreed garment centerline; record the distance from the specified reference point to the top of the complete artwork group.” Add the agreed numerical values and a drawing. Do not measure one version from the top of CREATE and another from an accent above it.
For B1, decide whether the message is intended to remain fully visible with the hood down. Show that condition. Raising the hood for every approval photograph can conceal a placement problem that appears during normal wear. For L1, define the start and end of the phrase and show its relation to the pocket and cuff; “down the leg” leaves both direction and usable area unresolved.
Keep exact words separate from the production artwork
Save the words as text as well as artwork. For Own Your Path, the copy sheet should preserve spelling, capitalization, punctuation and line breaks. It should distinguish the headline from the small supporting lines so that a supplier does not remove a line while simplifying the main word.
Keep three types of file distinct:
- Editable design master: the wording and layout source, with the relevant font information and permission to use it.
- Review export: a readable image or PDF showing the intended appearance, zone identifiers and revision.
- Production preparation: the files and settings proposed for the chosen decoration process, checked with the supplier and linked to the same revision.
A flat PNG can be a useful visual reference, but its visible letters are not automatically editable text objects. Likewise, outlining text changes how it can be edited. Adobe's explanation of vectorizing fonts describes converting characters to vector shapes and recommends duplicating the text beforehand because the original character and font settings are no longer available in the outlined copy. Keep the live-text master alongside any outlined export.
Vector shapes also do not decide the embroidery process. A digitizer may need to prepare the construction for the actual method, garment and scale. Ask what source files the supplier requires instead of treating a file extension as proof that the artwork is ready. The existing streetwear embroidery design guide explains that separate artwork-to-stitch decision in more depth.
If a creator wants to replace MAKE YOUR MARK with MAKE YOUR OWN MARK, that is a revision to L1. It adds a word and changes the composition. Do not silently squeeze the new phrase into the old box and assume it remains approved. Review line direction, letter proportions, spaces, physical size and the relation to the taper again. A successful text change in a graphics application would not establish a successful stitched result.
Describe the texture, then ask for a method proposal
The concept suggests distressed large lettering and cleaner small wording. That appearance does not uniquely identify the manufacturing method. Separate the visual objective from the construction you want the supplier to propose.
For the large words, specify what matters visually: cream against charcoal, readable internal spaces, a controlled irregular edge and a particular outline relationship. Then ask whether a fabric appliqué with an agreed edge treatment, direct embroidery or another proposed route should be sampled. Do not label every raised or frayed-looking effect “chenille” or assume that a render shows real stitch construction.
Madeira's appliqué guidance describes attaching an added material layer to a base with stitches and preparing the relevant placement and attachment elements. It also notes the need to test the intended result. That supports a useful distinction for the buyer: fabric-plus-stitch construction is different from filling the entire letter with thread. The guide's particular backing and application recipe is not a universal specification for this sweatsuit.
Discuss those alternatives through Athletic Rush's Appliqué and Patches development page and Printing and Embroidery capability page. Ask for the proposed material, edge treatment, reverse-side finish and physical trial. Request an explanation of what changes in appearance, handling and preparation between proposals rather than assuming one route is always better or cheaper.
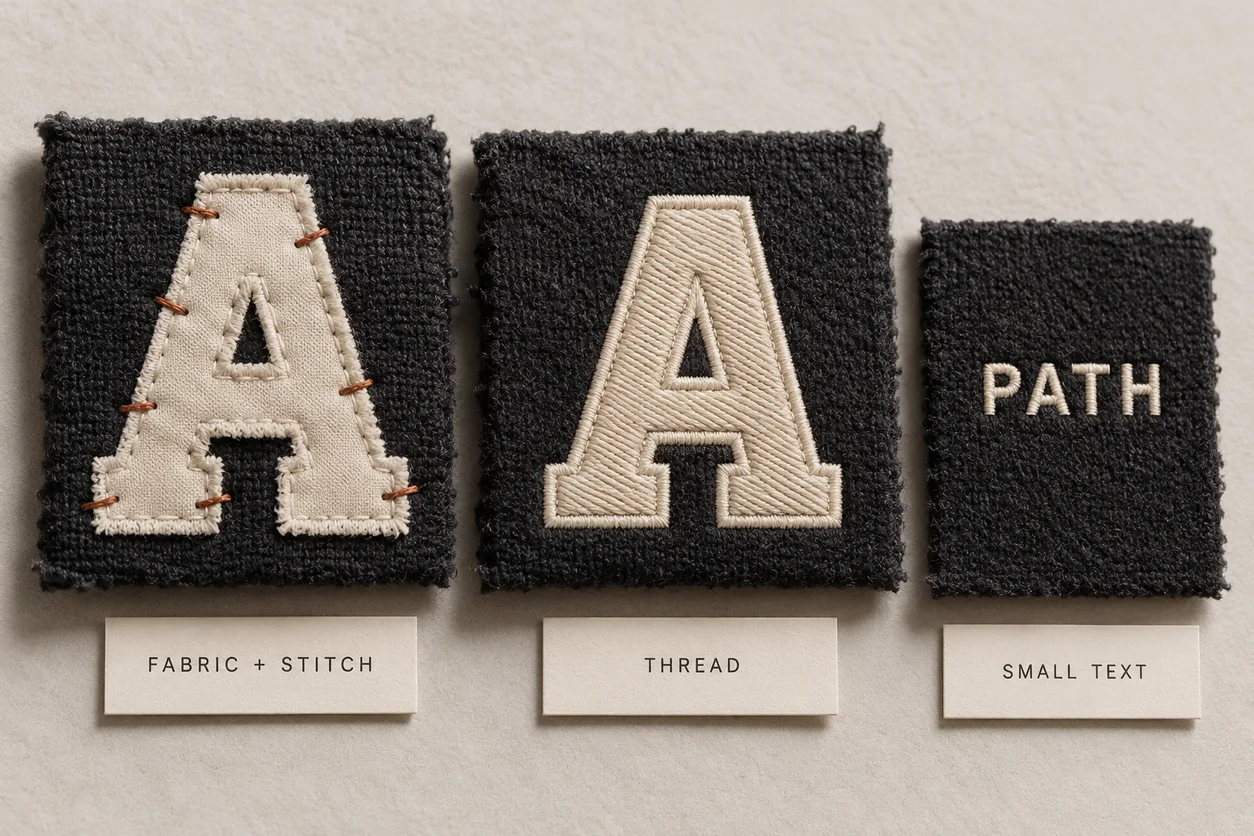
Concept illustration: added fabric, thread coverage and small lettering are different construction questions. These illustrated pieces are not production samples, matched tests or proof of durability. The sparse attachment depiction on the left is not a recommended stitch specification.
The small sentence under F1 needs its own review. It can appear readable on a large design board while becoming difficult to read at the intended physical size. Wilcom's embroidery-font documentation provides font-specific size guidance and explains that recommended heights refer to uppercase letters. Its practical implication here is to check the actual lettering and scale with the digitizer, not to apply one universal minimum to every font, fabric and thread combination.
If the small line fails the review, choose a deliberate revision: increase it, shorten it, simplify the lettering or discuss a different decoration proposal. Record which choice the brand approved. Enlarging the whole F1 group may create a new pocket-clearance problem, so recheck the group rather than improving one sentence in isolation.
Check the leg from the wearer's point of view
“Left leg” is a common source of avoidable confusion. In a front-facing drawing, the wearer's left is on the viewer's right. Label the drawing front view — wearer left, and show the phrase exactly as it should read. Do not rely on a mirrored lifestyle photograph or an unlabeled screenshot.
For L1, MAKE YOUR MARK is one sideways line running from the thigh toward the ankle. Identify its rotation and reading direction with the actual phrase, not only a narrow rectangle. Keep that direction consistent in the master, review export and sample instruction. A vertical stack of individual letters would be a different layout.
Consider the phrase on the relaxed leg and during relevant movement. The thigh, knee and ankle do not offer the same shape or view. A placement that looks centered while flat may move toward the side in wear. Ask to review the real garment and the intended presentation; do not treat a flat concept image as proof of where the decoration will sit during wear.
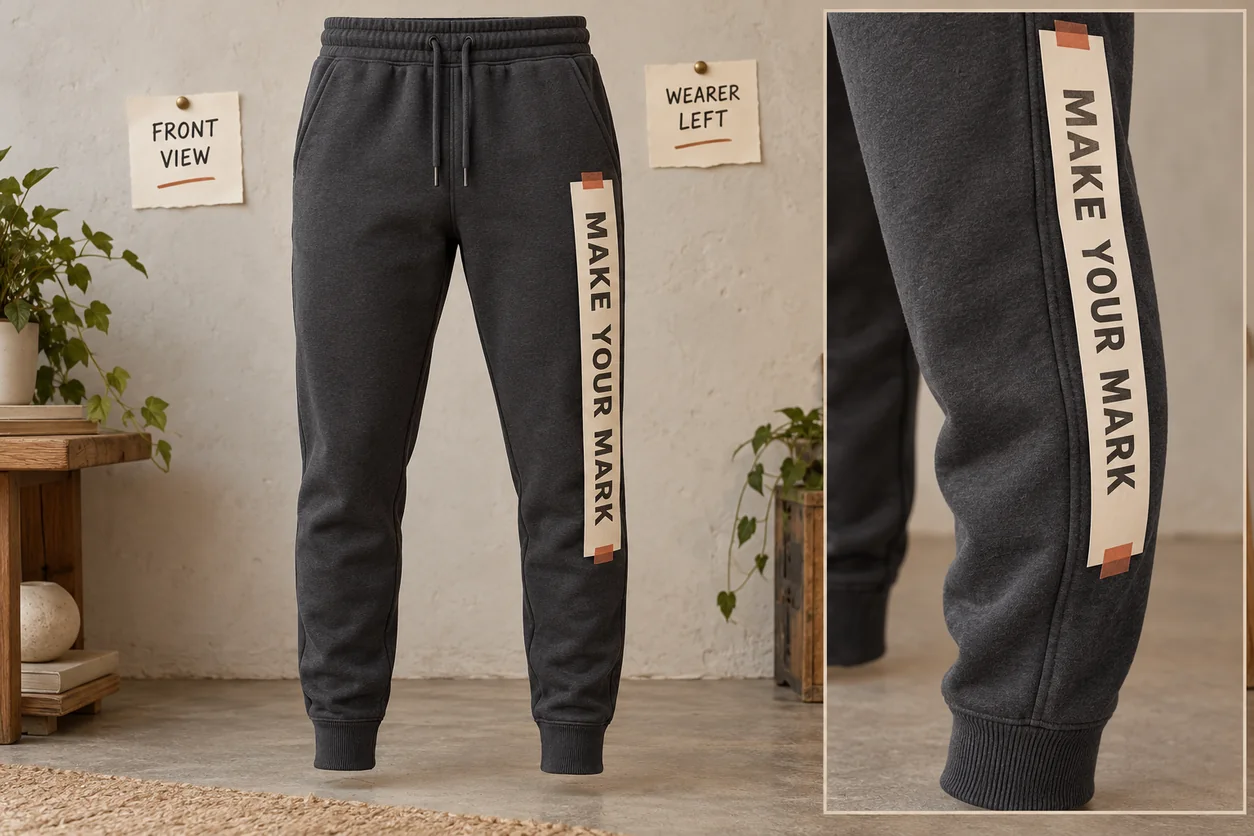
Concept illustration: wearer-left is viewer-right in this front view. The paper strip explains orientation and surrounding construction; it is not an applied decoration, approved dimension or evidence of a tested garment.
Review the pocket opening, any proposed decoration access, side seam and cuff with the supplier. If the garment must be decorated at a particular stage of assembly, ask how that affects the proposed placement. The illustration does not establish a machine's access or capacity. Confirm that separately rather than discovering it after the pattern and artwork have both been treated as final.
For a size range, ask whether each artwork will stay at one physical size, use defined size groups or have another agreed scaling approach. Each choice changes the review. Do not automatically shrink F1, B1 and L1 by the same percentage: they interact with different garment features. Mark the intended artwork-to-garment-size relationship in the specification and identify which sizes still need to be checked.
Approve the right evidence at each step
There are several different approvals in a graphic set. Approving the wording does not approve the pocket clearance. Approving a decoration trial does not approve the fit. Keep the evidence and open questions visible so that a promising image is not mistaken for approval of the entire order.
| Review item | What it can help establish | What remains to be checked |
|---|---|---|
| Copy sheet and artwork export | Exact words, line breaks, colors as represented and revision identity | Physical color, texture, scale on the garment and construction |
| Actual-size paper layout | Proposed footprint and relationship to identified garment features | Stitched appearance, reverse side, wear behavior and care outcome |
| Identified decoration trial | Appearance and handling of that proposed construction on the stated material | Final garment position, other zones and any untested conditions |
| Decorated garment sample | Combined layout, fit interaction, reverse-side finish and the identified garment's appearance | Unchecked sizes, untested care conditions and bulk consistency |
| Recorded review decision | Which item and revision was accepted, changed or left open | Any requirement outside the explicitly reviewed scope |
For Own Your Path, keep F1, B1 and L1 on a single review record while giving each its own decision. A useful comment is: “F1 wording and line breaks accepted in artwork revision A2; small supporting sentence and finished group dimensions remain open pending the identified physical trial.” That is more actionable than “looks good.”
On the decorated sample, inspect the front, back, leg and reverse sides. Look at readability, overall placement, the relationship between large and small lettering, edge treatment, local distortion and how the garment feels in the decorated area. Refer to Athletic Rush's hoodie embroidery puckering checks if the surface is drawn in around the work. A photograph can identify a question; it cannot establish comfort, hidden construction or the outcome of a care procedure that has not been performed.
Agree any care review and record the garment's starting condition and the procedure used. Do not describe a home observation as a standardized test. If a particular performance claim or formal test is required, identify the applicable requirement and qualified testing route separately.
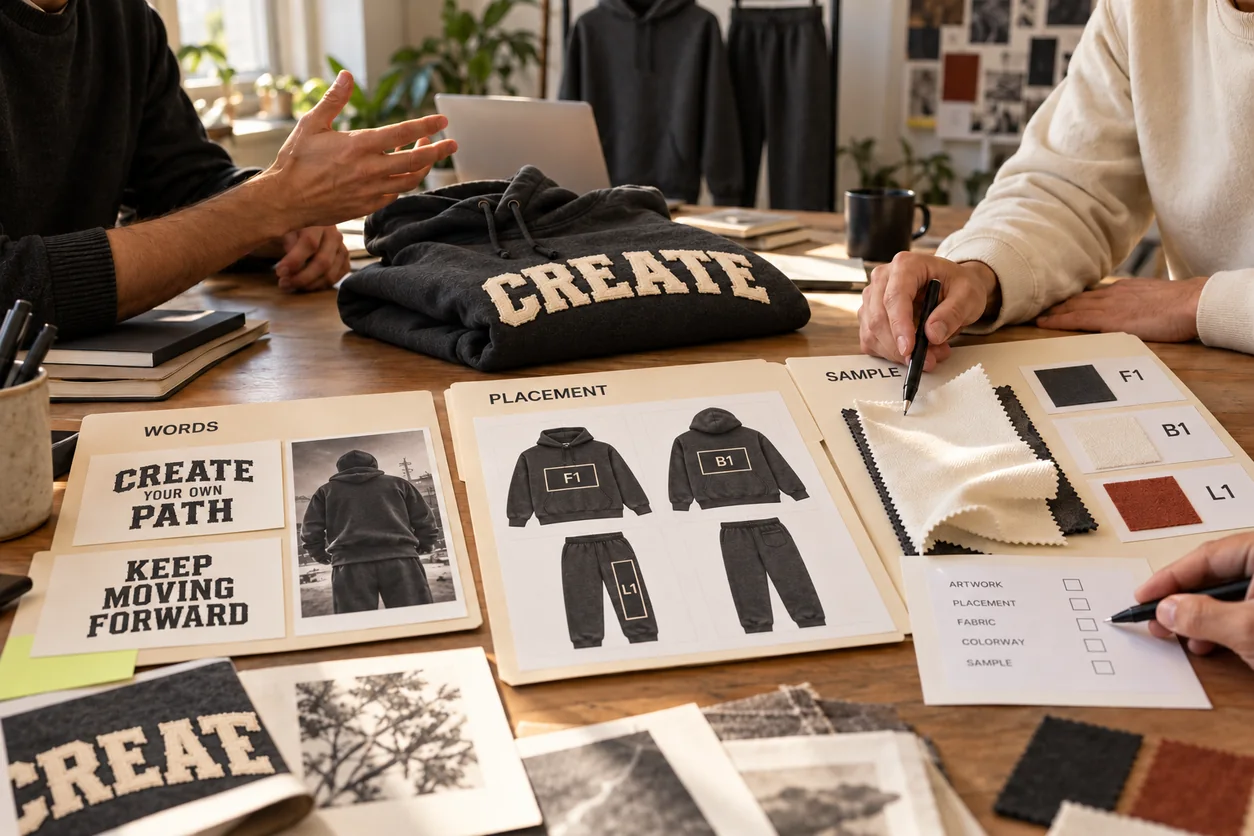
AI teaching scene: separate words, placement and sample decisions. The people and folded garment are illustrative, not Athletic Rush staff, a customer meeting or a completed physical sample.
Send a brief that can be answered
Use Athletic Rush's streetwear tech-pack and sampling brief guide for the wider document structure. For this graphic set, the following copyable message keeps the artwork discussion focused:
“We are a U.S. brand developing a hoodie-and-jogger set using the attached Own Your Path concept as a visual direction. Please treat it as a concept, not an approved product specification.
- Garments: [hoodie and bottom identifiers, fit references, garment revision and size range].
- Material and finish: [proposed fabric, color and finish references; items requiring your proposal].
- F1: [exact words and line breaks], [artwork revision], [overall dimensions and units or proposal requested], [placement reference and values].
- B1: [exact words and line breaks], [artwork revision], [hood coverage requirement], [dimensions and placement].
- L1: MAKE YOUR MARK, wearer-left leg, front-view direction as shown; [dimensions, placement and size-range approach].
- Decoration: large words should have [specific visual edge and texture objective]; small words should have [readability and appearance objective]. Please propose the construction and physical trial needed for each.
- Files: [editable master, review exports and any existing production files, with revision names].
- Review: please identify what the artwork proof, decoration trial and full garment sample will each cover, including the open sizes and questions.
- Order scope: [quantity per design, colors, size breakdown and U.S. destination]. Please itemize the hoodie and jogger requirements and confirm the applicable minimums.
- Timing: [target date and what is already approved]. Please separate sampling, revisions, production and shipping in your proposal.”
This is an enquiry template, not a completed order. A top and a bottom should have clear separate specification lines. Do not assume that combining small quantities of different designs creates one qualifying minimum, or that a minimum stated in pieces automatically means complete sets. Confirm the order structure in the quotation.
Questions new brands ask about graphic sweatsuits
Can I begin with an AI concept instead of a finished tech pack?
Yes, as a clearly labelled starting reference. Identify which parts of the image matter and which decisions are still open. Then agree the garment, artwork zones, production preparation and sample review. The image alone does not establish fabric, dimensions, method, cost or readiness for bulk production.
Can buyers change the front, back and leg words independently?
They can be designed as separate artwork groups, with editable text retained in the source files. Changing one group still needs a new identified review of its fit, wording and production preparation. The concept images in this article do not provide a live editing interface or demonstrate that online customization is available.
Should the hoodie and jogger use identical lettering sizes?
Not automatically. Coordinate the visual language, then decide the physical size and placement for each zone and garment size. The hoodie chest, hooded back and tapered leg have different boundaries. State the agreed relationship and check representative physical samples rather than using one unexamined scale rule.
Is the distressed embroidery appearance already a confirmed technique?
No. It is a visual direction in this concept. Ask for the proposed construction, edge treatment, material and decoration trial. Confirm the result on the intended garment before using the image as a promise of what production will deliver.
Discuss your first graphic set with Athletic Rush
Bring the concept and the unresolved decisions to Athletic Rush's collection-development service. For a first U.S. drop, a useful conversation starts with the exact garments, three identified artwork zones and what the next sample must answer.
Athletic Rush manufactures in Sialkot, Pakistan, serving U.S. clothing-brand enquiries. Its owner-confirmed minimum is 30 pieces per design, allowing one to three colors and mixed sizes within that same design; every different design requires its own 30 pieces. Samples take 4–6 working days. Bulk production takes 8–10 working days for orders up to 100 pieces; larger orders depend on quantity. Shipping time is separate. Confirm the scope, timing basis and any development-specific requirements for your proposed set before making a launch commitment.
Send your reference image and F1/B1/L1 brief through the Athletic Rush quotation and sample discussion form, email kamran@athleticrush.co, or contact Athletic Rush on WhatsApp. Ask for the next specific proposal or sample review needed to turn your graphic direction into an agreed garment specification.